Register a new domain at Hostgator

Register a new domain at Hostgator

Hello readers, currently I am preparing a new blog which will use Wordpress as the platform. This blog will remain available and I will keep posting on this blog about Linux tutorial and some other stuffs. But my new Wordpress blog will also contain the similar topics. By using Wordpress I hope I can reach more readers and I think it has more features compared to Blogger.
I choose Hostgator as the domain and hosting provide since it gives a good support and has a good performance on my previous blog at gamblis.com. The new blog is being prepared so it can't be accessed at the moment. I'll wait you there, soon. :)

Linux Deepin 2013 screenshot tour

Linux Deepin 2013 has been released. I just downloaded and install it on my VirtualBox. Here I want to share some Linux Deepin 2013 screenshots. Linux Deepin 2013 was built based on Ubuntu. Its pretty easy to use and has a beautiful interface design. 
Linux Deepin 2013 Installation Wizard
Its pretty easy to get Linux Deepin 2013 installed on your computer or Virtual machine. Within few minutes, you will have this elegant Linux distribution on your PC. Thanks to wizard based installation. 

Linux Deepin 2013 is now available

The new version of Linux Deepin 2013 is here. Linux Deepin is an Ubuntu based Linux developed by Chinese Linux community which has a beautiful interface. It has an elegant design, simple and easy to use. Linux Deepin supports almost any Ubuntu software and packages. Linux Deepin 2013 is available in 3 different languages, English, Traditional Chinese and Simplified Chinese. Here I just want to include the English version only.

OpenMandriva Lx 2013 Screenshots tour

I just downloaded the latest stable version of OpenMandriva Lx 2013 and now I am currently testing it on my VirtualBox. Still struggling to find out how to install VirtualBox Guest Additions on my OpenMandriva Lx 2013 and still no luck. Here I just want to show you some basic view of OpenMandriva Lx 2013. OpenMandriva Lx 2013 brings a lot of new updated software, but still comes with old Mandriva style desktop. 
Mandriva Lx 2013 is pretty fast, lightweight and easy to use. If you are a Mandriva users, you will love this OpenMandriva Lx 2013. 
OpenMandriva 2013 Desktop

Install Virtualbox guest additions on Fedora 20

It still in Beta version but Fedora 20 attract me to try it on my Virtualbox. Fedora 20 Beta can be installed through the latest version of Virtualbox without any problems. After installed, guest additions is the first thing I installed. This short tutorial will show you how to install Virtualbox guest additions on Fedora 20.

We need to install couple packages before installing the Guest additions. Please open Terminal and as root, execute these commands:

yum update kernel*
yum install gcc kernel-devel kernel-headers dkms

Once finished, reboot Fedora 20. After reboot install Guest additions. go to Devices | Install Guest Additions on Virtualbox main window. If the autorun prompt does not work automatically, simply Open File Manager and click the VBOXGUESTADDITIONS device. Next, double click the autorun.sh instead. 
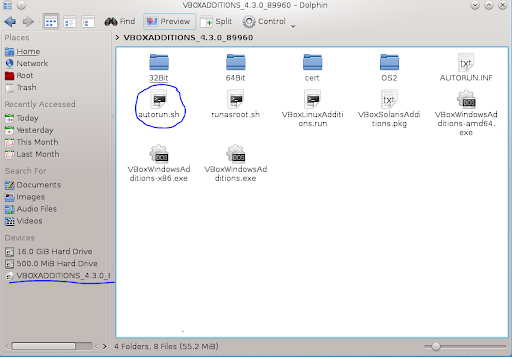
You will be asked to enter root password. Now the installation will take place and wait until it finished, reboot or simply logout and login again to Fedora 20. Now the Guest Additions should be activated. 

Fedora 20 Beta Screenshots

The upcoming Fedora 20 is now available for testing. I am not a big fan of Fedora but reading the news about the new Fedora 20 Beta seems interesting. I installed this Fedora 20 Beta on my VirtualBox and the installation went pretty well. Installing Fedora is very very easy. In few steps Fedora 20 is ready. Here are some screenshots of the new Fedora 20 Beta.
A fresh login screen has been improved on Fedora 20.

How to create Windows 8 USB Installer using Windows 8 USB Installer Maker

I just bought a new desktop PC with AMD processor but I do not have DVD ROM on it. So I will need to create a USB Installer to install Windows 8 on my Desktop PC. I found a simple and easy to use application to create Windows 8 USB installer called Windows 8 USB Installer Maker. Windows 8 USB Installer Maker is a free and simple application. 
To create a Windows 8 USB Installer, you will need these items:
  • A 4 GB or more USB flash drive
  • Windows 8 ISO
  • Windows 8 USB Installer Maker (Download it from here)
First, download the Windows 8 USB Installer Maker and extract it to your PC. Now you should have a new folder which contains some files. Double click the file Win8USB.exe.

How to install gcc 4.8.1 on Ubuntu 13.10

How to install gcc 4.8.1 on Ubuntu 13.10

GCC is a popular compiler for most recent Linux distribution. Linux distribution will need this gcc package to compile many other packages or applications. Make sure your Linux has the latest version of gcc 4.8.1. This tutorial is going to show you how to install gcc 4.8.1 on Ubuntu 13.10 which is also applicable for most Ubuntu derivatives as well.

To install gcc 4.8.1 on Ubuntu 13.10, please follow these steps:

1. Add the PPA

sudo add-apt-repository ppa:ubuntu-toolchain-r/test

2. Update Ubuntu

sudo apt-get update

3. Install gcc 4.8.1

sudo apt-get install gcc-4.8

That's it.

How to recover files from CD/DVD Rom using BadCopy Pro

BadCopy Pro is a powerful recovery application that will help us to recover or copy files from a CD/DVD Rom. If ordinary copy and paste method does not works on CD/DVD ROM caused by file read error or physically damaged CD, we can use this BadCopy Pro to recover it. BadCopy Pro supports various media such as CD/DVD ROM, Memory Card, Flash Disk, Floppy Disk. Its a powerful recovery software. 

Ubuntu Gnome 13.10 - Gnome powered Ubuntu

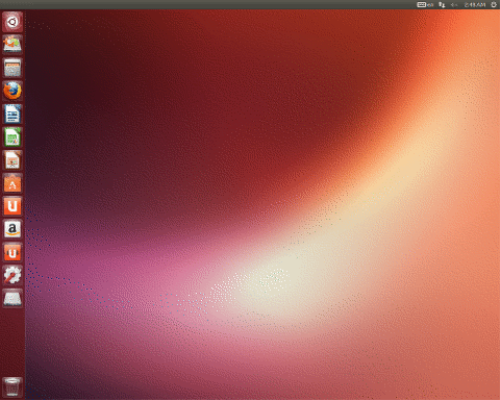
Ubuntu is a popular Linux distribution developed by Canonical. Ubuntu 13.10 Saucy Salamander is the latest version and it's mainly powered with Unity desktop. For some people, Unity desktop is quite confusing, including me. Many people prefer Cinnamon, Gnome, Xfce because the are simpler than Unity. The UbuntuGnome community develop Ubuntu 13.10 with Gnome desktop. The call it Ubuntu Gnome 13.10, the official Ubuntu 13.10 with Gnome desktop. 
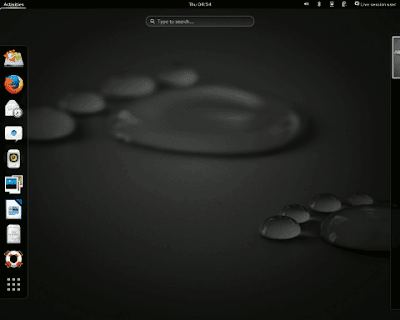
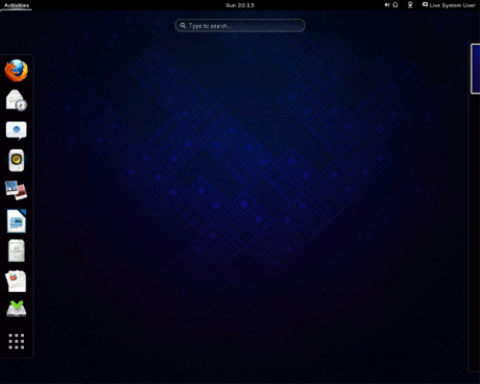
Ubuntu Gnome features Gnome 3.8, the most recent Gnome release that includes new boot loader theme etc. Ubuntu Gnome 13.10 is good but since I'm not a fan of Gnome either, I cannot give more review about this. Try yourself and if you like Gnome, you will like this Ubuntu Gnome 13.10
How to install Adobe Reader on Fedora 19

How to install Adobe Reader on Fedora 19

Adobe Reader is a free application to open, view Adobe PDF files. On this tutorial you will find how to install Adobe Reader on Fedora 19 using YUM repository. By installing using this way, we can get future update easily.
To install Adobe Reader on Fedora 19, follow these steps
1. Add repository
Paste this command on Terminal as root
rpm -ivh http://linuxdownload.adobe.com/adobe-release/adobe-release-i386-1.0-1.noarch.rpm
rpm --import /etc/pki/rpm-gpg/RPM-GPG-KEY-adobe-linux

How to install Adobe Flash Plugin on Fedora 19

How to install Adobe Flash Plugin on Fedora 19

Adobe Flash Plugin must be installed on Fedora 19 in order to play multimedia content over the internet using web browser. With Flash Plugin we are able to play YouTube videos and any other online video streaming contents. On this tutorial, I am going to show you how to install Adobe Flash Plugin on Fedora 19 using command line. Its pretty simple. 
How to install Adobe Flash Plugin on Fedora 19
Step 1. Add Adobe repository to Fedora 19 and import key
For 32 bit Fedora 19
rpm -ivh http://linuxdownload.adobe.com/adobe-release/adobe-release-i386-1.0-1.noarch.rpm
rpm --import /etc/pki/rpm-gpg/RPM-GPG-KEY-adobe-linux
For 64 bit Fedora 19
rpm -ivh http://linuxdownload.adobe.com/adobe-release/adobe-release-x86_64-1.0-1.noarch.rpm
rpm --import /etc/pki/rpm-gpg/RPM-GPG-KEY-adobe-linux

Default user and password for Fedora 19 LiveUSB

Default user and password for Fedora 19 LiveUSB

I was trying to create a Fedora 19 LiveUSB and it was successful. I was using Linux Live USB Creator (LiLi) I can boot my PC with my LiveUSB but stuck on the login page. It asking me to enter the username and password which I don't have it since I don't create it yet. So what is the user and password? Hmmm....
Searched on Google and found the answer on this forum thread: http://www2.fedoraforum.org/showthread.php?t=288655. The problem came from the software I used to create the LiveUSB. The users on the forum suggest to use another software to create Fedora LiveUSB such as LiveUSB Creator, dd, livecd-tools.
If you have the same problem with mine, you should try to use those tools to create Fedora LiveUSB. I will share on this blog if I can solve this problem.

OpenMandriva Lx 2013 Alpha is now available for testing

OpenMandriva development is now reached its Alpha version. This is the new OpenMandriva Lx 2013 Alpha. OpenMandriva project tried to continue the success of its ancestor Mandriva which is stopped due to financial problem in 2012. For Mandriva lovers, OpenMandriva could be the best distribution to replace Mandriva. It has the Mandriva tool set, user interface and many more. OpenMandriva itself was built using ROSA Linux distribution. 

SharpDevelop tutorial - Hello World

Hi, starting today I want to learn about programming and I choose SharpDevelop for Windows. SharpDevelop is a free programming application which is free, rich features, supports various programming language such as C#, C++, VN.Net etc. And today, this is my first application called "Hello World".
Here is my application in action :)

Install XBMC 13.0 on Ubuntu 13.04 Raring Ringtail

This tutorial is going to show how to install the latest version (nightly build) of XBMC on Ubuntu 13.04 Raring Ringtail. The latest version of XBMC 13.0 is now available for install from XBMC repository. Please note that this is a development version which contains bugs, use it at your own risk.
OK, do the following to install XBMC 13.0 on Ubuntu 13.04
First we need to edit the file /etc/apt/sources.list and add xbmc repository to this file. Open Terminal and type this command:
sudo nano /etc/apt/sources.list

How to install Flash Plugin on Debian Wheezy

How to install Flash Plugin on Debian Wheezy

This tutorial is going to show you how to install Flash Plugin non free on Debian 7 Wheezy. Flash Player or Flash Plugin is required by web browser to play multimedia, video content from online website such as YouTube, Daily Motion etc. You must have flash plugin installed on Debian Linux in order to play these videos. 
Install Flash Player on Debian Wheezy:
Open Terminal and edit the file /etc/apt/sources.list
sudo gedit /etc/apt/sources.list
Add the following line to the file
deb ftp://ftp.debian.org/debian stable main contrib non-free

Ubuntu 13.10 Saucy Salamander download

The new version of Ubuntu 13.10 Saucy Salamander is now reached its final release. Ubuntu 13.10 comes with many new updates such as:

  • Kernel 3.11.x stable version which supports more devices, better power management and performance.
  • GNOME 3.8 based on Unity
  • Firefox 24 default web browser
  • LibreOffice 4.12 for office suite
  • Thunderbird 24 for E-mail client
  • GIMP 2.8.6 for photo editing
  • Rhythmbox 2.99 default music player
  • Newly introduced Smart Scopes

For Ubuntu lovers, you may download this Ubuntu 13.10 Saucy Salamander from the link we provided below:

Download Kingsoft Office 9.1 for Ubuntu, Fedora

Kingsoft Office is a free Office Suite application for Linux, Windows, Android and Mac. Kingsoft Office is the best alternative to Microsoft Office 2013. It has a beautiful user interface, rich features and easy to use. The latest version of Kingsoft Office 9.1 is now available for download.

How to restore Ubuntu to previous state

In Windows, we can restore to a previous computer state using Restore point features. This feature is very helpful if something happen to Windows for example corrupted after software installation and we can easily come back to previous state. But the question here is there any way to do this on Ubuntu? 
Introducing TimeShift, a simple backup and restore program for Linux which lets us to create a restore point and revert Ubuntu to previous state easily. By having TimeShift installed on Ubuntu, there will be no more worry if in the future our Ubuntu crashes or corrupted. TimeShift will entirely restore our Ubuntu system in matter of minutes. Technically, TimeShift was built with rsnapshot and hard-link. So it is possible to restore system easily.
TimeShift is a graphical application. Don't worry about typing commands in Terminal. It has a simple user interface.

How to create PearOS 8 Live USB

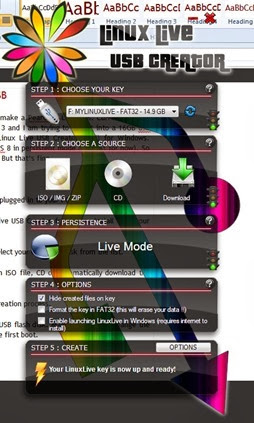
This tutorial is going to show you how to make a PearOS 8 Live USB. Currently, when this post is written, PearOS 8 still in Beta 3 and I am trying to load it into a 16GB usb flash disk. The software I am using is Linux Live USB Creator (LiLi) for Windows. Unfortunately, LiLi does not support PearOS 8 in persistent mode (at least for now). So I just can use my USB as a Live mode only. But that’s fine.

pearos live usb


How to add songs to music library in XBMC

XBMC offers a simple way to organize your music collections into a music library. This can be automated through XBMC scan to library feature. By doing this way, XBMC will organize your music based on song, artist, albums and many other. How to do this?
Step 1. Add files to XBMC
At first, make sure you've added files or folders containing your audio files to XBMC. You can do this using this way:
Go to Music section and press Files. Then click Add Sources

How to install XBMC on Ubuntu 13.10 Saucy Salamander

How to install XBMC on Ubuntu 13.10 Saucy Salamander

In this article I want to show you how to install XBMC 12.2 Frodo on Ubuntu 13.10 Saucy Salamander. This tutorial also applicable to Linux Mint 15, Pear OS 8 and many other Ubuntu 13.10 derivatives. 
XBMC is a rich features multimedia center for Linux and Windows. It has many features such as audio, video player, photo viewer, internet TV and so on. XBMC has a pretty cool interface. 
To install XBMC on Ubuntu 13.10, simply use this command below
sudo apt-get install xbmc
Once finished, you can start configure the network, add audio and video files to be played.

How to install TeamViewer on Ubuntu 13.10 Saucy Salamander

How to install TeamViewer on Ubuntu 13.10 Saucy Salamander

This Ubuntu tutorial will show you how to install the latest version of Team Viewer. As you might know, Team Viewer is a free remote desktop application. We can connect and gain full control of a remote computer over the internet using Team Viewer.
To install TeamViewer on Ubuntu 13.10 Saucy Salamander, please follow these steps:
Step 1. Download Team Viewer DEB packages:
Step 2. Open Terminal and execute this command:
sudo dpkg -i teamviewer_linux.deb
Step 3. Start connect to a remote computer using Team Viewer.
How to install Cheese on Ubuntu 13.10

How to install Cheese on Ubuntu 13.10


Cheese is my favorite webcam application. Its very simple, fun and easy to use. Cheese is not available by default on Ubuntu 13.10 (at least until Ubuntu 13.10 Beta 2, Cheese is not there). Cheese can be used to record a video using built in webcam on your laptop very easy. You can take still photo, add effects to the video and many more.
We can easily install Cheese in Ubuntu 13.10 Saucy Salamander with a single command.
sudo apt-get install cheese
With the command above, Ubuntu 13.10 will download and install Cheese.

Enhanced by Zemanta

BBM for Android what's the story now?

bbm android
bbm android (Photo credit: tecnomovida)
Few days ago, Blackberry Limited announced the availability of their popular BBM application on Android and iPhone. But few days later, they cancel it and remove BBM from iTunes store. Its been a while and there still no news from Blackberry. Whats the story now?
I am a Blackberry and Android user. And if BBM is ready on Android platform, I want to throw my Blackberry away :)...just kidding hehe

Enhanced by Zemanta

Create a Virtual Router using MO Virtual Router

We can easily turn a laptop into a wireless router (WiFi) and share the internet connection with other users easily. MO Virtual Router is a free application which can turn a laptop into a virtual router. In order to install MO Virtual Router, your computer must have .NET Framework 4.5 installed. If not, this program will automatically download and install .NET Framework 4.5 before it can be used. 
Based on my own experience when using MO Virtual Router, this application is very stable and can spread my internet connection via WiFi to other WiFi enabled devices. MO Virtual Router is very simple. 
To use it, simply type the WiFi name and password. Then, press Create WiFi Point and Start Wi-Fi to start it. That's it. With MO Virtual Router, you can easily turn a laptop into a powerful wireless router. 

How to install Adobe Flash Plugin on Ubuntu 13.10

Linux is getting easier especially Ubuntu. On this tutorial, I will show you how to install Adobe Flash Plugin on Ubuntu 13.10. Instead of typing commands to install Adobe Flash Plugin, Ubuntu Software Center provides easier way to install Adobe Flash Plugin.

Install Adobe Flash Plugin on Ubuntu 13.10 via Ubuntu Software Center

Step 1. Open Ubuntu Software Center
Step 2. Type flash on the search box

Ubuntu 13.10 Beta 2 Screenshots

I just installed the latest development version of Ubuntu 13.10 Beta 2 on my Virtualbox. Here are some screenshots of Ubuntu 13.10 Beta 2. There seems not many interface upgrade compared to previous Ubuntu 13.04 version. 
Ubuntu 13.10 Beta 2 Desktop

How install Virtualbox Guest Additions on Ubuntu 13.10

This tutorial will show you how to install Virtualbox Guest Additions on Ubuntu 13.10. I just finished installed the latest Ubuntu 13.10 Beta 2 on my Virtualbox and now I am trying to install Guest Additions on it. And this method works perfectly.

How to install Virtualbox Guest Additions on Ubuntu 13.10

1. Go to Devices | Install Guest Additions on the Virtualbox window

Download Ubuntu 13.10 Beta 2

The development of Ubuntu 13.10 is now reached Beta 2 version. We can download this Ubuntu 13.10 Beta 2 iso and test the performance and its features. Together with this release, Ubuntu developer team also announce the availability and possibility to install Ubuntu on smartphone. Even its not a final version, the enthusiast should try to install this Ubuntu on their smartphone. Canonical team also has a good instructions how to install Ubuntu on Smartphone here.

ubuntu-small


Install Glusterfs Server on Mandriva 2012

Install Glusterfs Server on Mandriva 2012

Glusterfs is another NFS server for Linux which provides a robust NFS server capabilities. Glusterfs has many benefits compared to the ordinary NFS server that comes along with many Linux distribution. Its pretty easy to install and configure. In Mandriva 2012, simply use the following command to install Glusterfs server. Make sure this command executed as root privilege.

urpmi glusterfs-server

To check the glusterfs server version on your computer use this command instead

glusterfsd -–version

For more information, please visit Glusterfs website. In the future, I will post how to create and manage a glusterfs NFS server on Mandriva 2012.

How to install PlexMediaServer on Mandriva 2012

How to install PlexMediaServer on Mandriva 2012

This tutorial is going to show you how to install PlexMediaServer on Mandriva 2012. You can turn Mandriva 2012 into a multimedia server using PlexMediaServer which can be accessed from other computer on the same network. Also we can stream audio and video from Android devices as well.

In order to install PlexMediaServer on Mandriva, please follow these steps.

1. Download the latest PlexMediaServer rpm package


Cannot open PlexMediaManager on Fedora 18

I just installed PlexMediaServer on my Fedora 18. The installation went well but when I tried to open the web console, it did nothing. I cannot open the PlexMediaManager via Firefox. I am still trying to find out why this happen. Maybe I need to get the latest version of PlexMediaServer to solve this problem.

Fedora 20 Alpha 1 is now available for testing

For Fedora lovers, the Alpha 1 of the upcoming Fedora 20 is now available for testing. The new Fedora 20 Alpha 1 comes with many new features including Linux Kernel 3.11, Gnome 3.10, KDE 4.11 and many others. Fedora 20 uses the ARM as the primary architecture. Fedora 20 is also called as “Heisenbug”.

fedora-20-iso-download


Sony Vaio VPCF1 Overheat, how to solve

I own an Intel Core i7 laptop SONY Vaio VPCF1 series. But I have an annoying problem on it. Everytime I play my favorite game says PES2013 on it, after few minutes it automatically shut down because of overheat. How to solve this problem? I searched around the net and still can’t get any solution so far.

I was advised to download and install Speedfan to check the fan speed. But I am not sure if this is a good way to solve it. What should I do, please help Sad smile

How to install MKVToolNix on Ubuntu Linux

MKVToolNix is a useful tool to edit Matroska (.mkv) movie file. Its a must have application for Matroska video fans. We can easily integrate subtitle to an existing .mkv file using MKVToolNix. Additionally we can also edit, merge the mkv video using this simple tool. Here I am going to show you how to install MKVToolNix on Ubuntu and its derivatives like Pear OS, the OS that I am using to write this post.

First add the gpg key to your system. Simply execute the following command:
 wget -q -O - http://www.bunkus.org/gpg-pub-moritzbunkus.txt | sudo apt-key add -
To install MKVToolNix on Ubuntu, please add the following lines to your /etc/apt/sources.list. Select the right Ubuntu version below.

Download Zentyal 3.2 ISO

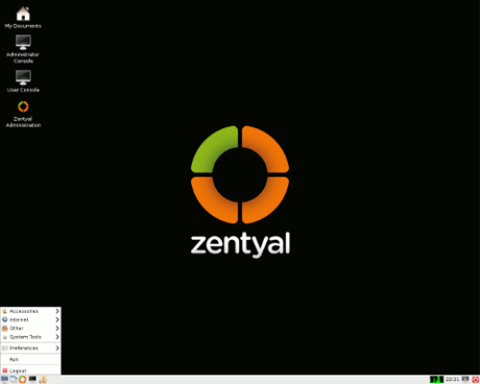
Zentyal 3.2 has been officially released. Zentyal is an Ubuntu based Linux distribution that was modified and optimized for home server purposes. It comes with a simple web GUI for easier maintenance and configuration. This new Zentyal 3.2 has many major improvements. It was built based on Ubuntu 12.04.03 and featuring Linux 3.8 on board.

zentyal-small


Interface Pear OS 8 terinspirasi oleh iOS 7

Tidak dipungkiri, Pear OS atau Pear Linux merupakan distribusi Linux yang cukup cantik, enak dipandang dan mudah digunakan. Dan versi terbaru Pear OS 8 (masih dalam pengembangan) sedikit banyak mengingatkan kita kepada tampilan iOS 7 yang juga baru saja dirilis oleh Apple. Dalam sebuah screenshot yang ditampilkan di halaman Google Plus salah seorang pengguna Pear OS 8, terlihat design icon di Pear OS 8 cukup menarik dan sekali lagi mirip dengan desain iOS 7.

How to add subtitle to MKV video file

On this tutorial I am going to show you how to add subtitle to a .MKV video file. By adding the subtitle, we can then play the video on BluRay player or directly to the TV via USB disk (if the TV supports .mkv video).

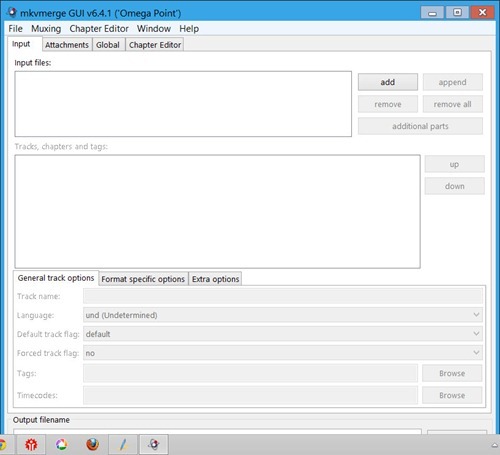
To add subtitle to .mkv video, we need a free tool called MKVToolNik. Its a simple application that is helpful for mkv lovers like me. OK I will try to illustrate how to add subtitle to MKV video using MKVToolNik. Make sure you download the software and install it on your PC. Just for you information, MKVToolNik also available for Linux OS. Next time I will post how to install this software on Linux.

1. Open MKVToolNik

mkvtoolnik


Install Ubuntu One Cloud Storage on Windows 8

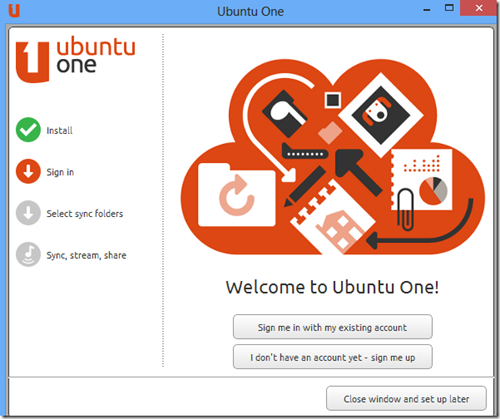
Is it possible to install Ubuntu One Cloud Storage on Windows 8? Yes, Canonical as the developer of Ubuntu Linux has developed Ubuntu One Cloud Storage application for Windows users. Now, Windows 8 users can store their files on Ubuntu One Cloud Storage with a special application. Ubuntu One is free for personal use. You can sync your files over the internet.

ubuntu-one-windows-8

How to install Flash Player on OpenSUSE Linux

How to install Flash Player on OpenSUSE Linux

I just found my old laptop containing OpenSUSE 11.0 installed on it. But unfortunately Flash Player plugin is not installed so I cannot play YouTube videos from this laptop because missing Flash Player. If you have the same problem with me, you can solve this kind of problem by installing Flash Player on OpenSUSE. This short guide will help you to install Flash Player on OpenSUSE, especially OpenSUSE 11.0.
To install Flash Player on OpenSUSE you can simply run this command as root on Terminal.
zypper install flash-player
In few moments, after OpenSUSE finished downloading the packages, you can browse and watch YouTube and other online videos from your favorite web browser.

How to disable visual effects on Ubuntu 12.10

How to disable visual effects on Ubuntu 12.10

I just installed Ubuntu 12.10 on my Virtualbox. Overall, Ubuntu 12.10 can run with all features enabled but I feel Ubuntu 12.10 runs very slowly when I tried to minimize or maximize the window. The visual effects seems not run smoothly on Virtualbox. I’ve tried to enable the 3D and increase the VRAM amount on the guest machine but still have this problem.

After searching on Google I found a simple way to disable the visual effects on Ubuntu 12.10. And by disabling this effects, now my Ubuntu 12.10 runs faster on Virtualbox. All you need is to install Compiz Config Setting Manager (CCSM). After CCSM is installed we can disable many effects that are active.

How to install Systemback on Ubuntu 12.10

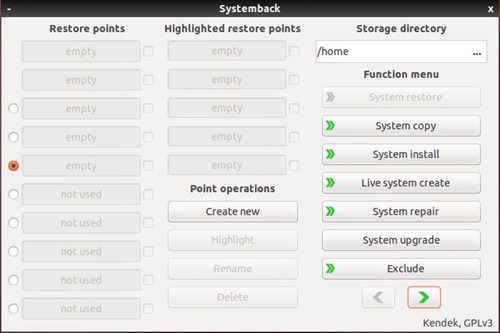
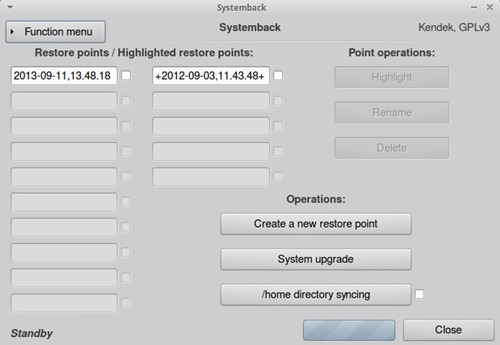
Systemback is a simple and powerful backup tool for Linux. On this tutorial I am going to show you how to install Systemback on Ubuntu 12.10. With Systemback you can create a complete system backup for your Ubuntu 12.10. You can then burn the ISO image and install the ISO on another computer as a clone or simply save the backup for future use. Systemback also has another important features such as:

  • System copy
  • System install
  • Live system creator
  • System upgrade
  • System repair

systemback-ubuntu

Create system restore point on Xubuntu using Systemback

On Ubuntu 12.04 there is an interesting application called Systemback. Systemback is a GTK application which can be used to backup our system in single click. Like in Windows OS, Systemback allows us to create system restore points. So we can go back to the previous system state if anything happened to our Xubuntu.

systemback


Foto-foto Tanjung Ringgit Lombok

Setelah puas bermain-main dan camping di Pantai Pink, saatnya melanjutkan perjalanan ke Tanjung Ringgit kira-kira 2 kilometer sebelah timur Pantai Pink. Di Tanjung Ringgit kita bisa melihat tebing-tebing yang berhadapan langsung dengan pantai selatan Pulau Lombok dengan ombak yang cukup keren. Disana ada juga peninggalan Jepang seperti meriam dan gua-gua bekas perang dunia ke 2. Berikut foto-foto Tanjung Ringgit

tanjung-ringgit-3

Berwisata ke Pantai Pink Lombok

Sedikit keluar dari topik blog, beberapa hari lalu saya menyempatkan diri untuk berkeliling Lombok bersama rekan-rekan saya. Ada beberapa pantai yang saya kunjungi. Selain Senggigi dan Gili Trawangan, Lombok masih punya banyak pantai yang jauh lebih indah yang pasti sangat menarik bagi Fotografer lanskap. Salah satu nya adalah Pantai Pink. Disebut Pantai Pink karena memang pasir nya berwarna agak pink.

Saya kurang tahu nama asli dari Pantai Pink ini. Pantai Pink terletak di tenggara Pulau Lombok dan masuk ke Kabupaten Lombok Timur. Jarak tempuh dari Mataram sekitar 2 jam menggunakan mobil atau sekitar 1.5 jam dari Bandara Internasional Lombok (BIL). Jalan sudah aspal dan mulus kecuali sekitar 2 km sebelum pantai jalan sudah rusak parah. Tetapi akan terbayar begitu melihat keindahan Pantai Pink, semua penat dan capek rasa nya langsung hilang. Kita bisa melihat gagahnya Gunung Rinjani dari Pantai Pink.

Beberapa foto yang diambil oleh Dhani Eko Nugroho

pantai-pink-3

Pantai Pink di pagi hari.

Pear OS 8, Linux dengan rasa MacOS X

Desain baru di Pear OS 8 (sekarang masih versi Beta) ini semakin kental dengan rasa MacOS X. Dulu kita harus bersusah payah untuk mendapatkan tampilan MacOS di Linux beragam paket seperti Mac4Lin kita install manual. Nah, bagi kawan-kawan yang suka dengan tampilan MacOS X, mungkin Pear OS 8 ini cocok buat anda. Saya juga berharap bahwa Pear OS ini akan merubah perspektif orang terhadap Linux. Linux tidak lagi susah, Linux tidak lagi old fashioned.

Desain Pear OS 8 ini berubah cukup radikal dibanding dengan versi sebelumnya Pear OS 7. Tampilan Pear OS 8 terasa lebih lembut, icon-icon juga didesain lebih halus serta lebih nyaman digunakan.

notification-area


How to install Musique on Linux Mint 15

What is your favorite musci player on Linux? Try Musique on your Linux and see what it can do for you. Musique is a simple multimedia/audio player for Linux, Windows and MacOS X. Musique features a nice look interface, supports various audio format, easy to use etc. This tutorial is going to show you how to install Musique on Linux Mint 15. This tutorial also applied to Ubuntu and its derivatives. 
Install Musique on Linux Mint 15
Open Terminal and type 
sudo apt-get install musique
Once finished, run it and specify the folder where you store your music.

How to install Gparted on Linux Mint 15

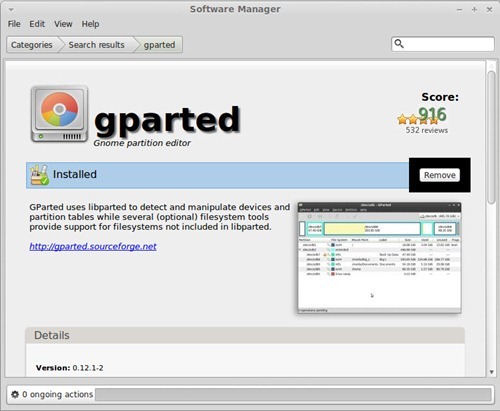
GParted is a useful application to manage the Linux partitions. This tutorial will show you how to install GParted on Linux Mint 15. Since GParted is available through Ubuntu repository on Linux Mint 15, we can easily install this application via Software Manager or command line.

How to install GParted via Software Manager

Open Software Manager and type gparted on the search box. Double click GParted and press Install button. In a few minutes, Gparted is ready for you.

gparted-mint

Appgrid, lightweight software manager for Ubuntu

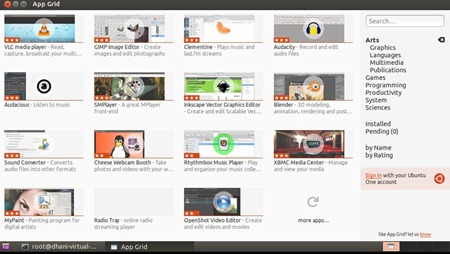
Ubuntu comes with Ubuntu Software Center to handle software installation. But sometimes, Ubuntu Software Center is too heavy for an older computer. There is another alternative to Ubuntu Software Center called Appgrid which can be used to install software but it much lighter compared to Ubuntu Software Center.

appgrid-ubuntu


Musique, a super cool multimedia player on Pear OS 8

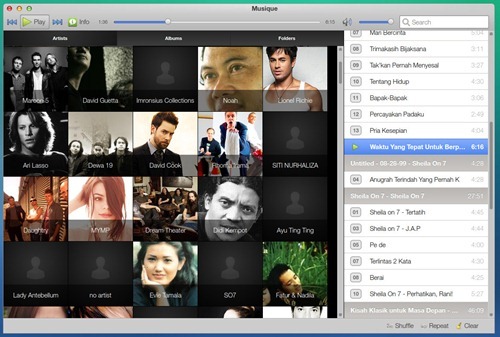
I just installed the new Pear OS 8 Beta 1 on my Virtualbox and its amazed me. New redesigned theme, color and some other new applications really can turn the ordinary people thought about Linux. I started with Musique. Musique is a super cool multimedia player that is the default audio player on Pear OS 8.

musique

Musique is available for Windows, Linux and Mac. Its a good idea for the Pear OS developer to include Musique on Pear OS 8. It has a simple user interface and looks like the new iTunes.

Kategori

Kategori