GParted Live 0.14.1-6 ISO download

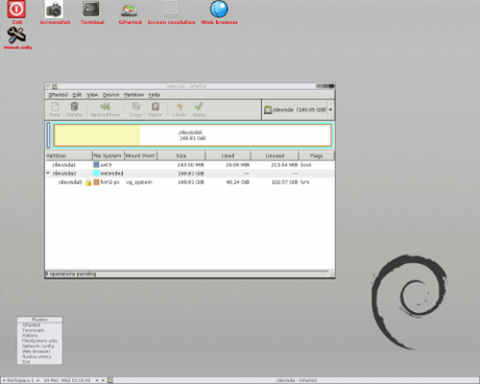
The new distribution release of GParted Live has been rolled out. Here is the new GParted Live version 0.14.1-6, a powerful Linux distribution that was designed for disk partitioning purposes. This new version of GParted is now supports Windows 8 which means we can boot this GParted on a Windows 8 computer and edit the partition inside it.

gparted-live


Convert FLV to MP3 on Ubuntu 12.10

Convert FLV to MP3 on Ubuntu 12.10

FLV is a common video format that usually found on online video website such as YouTube and some others. In some cases, we want to convert the FLV video and save the audio into MP3 format. In Linux, especially Ubuntu, we can easily convert FLV to MP3 using FFMpeg package. See how we do it.

A. Install FFMpeg

sudo apt-get install ffmpeg

B. Convert FLV video to MP3

To convert, use the following command

ffmpeg -i /home/video/test.flv /home/music/test.mp3


Change the /home/video/test.flv with your flv video location and change /home/music/test.mp3 as the destination.

Fatrat is my favorite download manager for my Deepin Linux 12.06

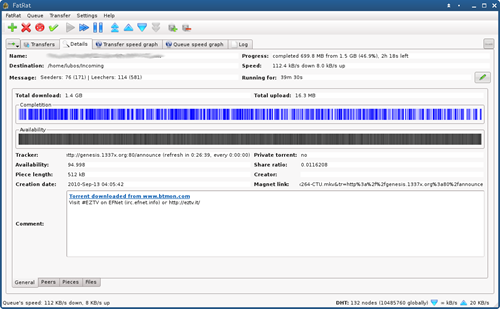
What is your favorite download manager for your Linux distribution? There are several good download manager applications available for Linux. Have you ever tried Fatrat? Fatrat is an open source download manager for Linux written in C++ and built on top of the Trolltech Qt 4 library. It is rich in features and is continuously extended.

With Fatrat, we can download torrent, ftp file and many more. We can also manage and limit the download bandwidth limit and speed. Fatrat is a free and powerful download manager that is easy to use and rich features.

fatrat

How to install Clamtk on Fedora 18

Clamtk is a powerful GUI antivirus that based on ClamAV, a powerful Linux antivirus. On this tutorial, I will show you how to install and configure ClamTk on Fedora 18. After this tutorial you will be able to install ClamTk on Fedora 18.

Steps to install Clamtk

Open Terminal and login as root and then type the following command
yum install clamtk
Once finished, you have to make sure that ClamAV virus database is up to date. Open the file /etc/freshclam.conf.
nano /etc/freshclam.conf
How to install Google Chrome on Linux Mint 14 Nadia

How to install Google Chrome on Linux Mint 14 Nadia

Google Chrome can be added to Linux Mint 14 Nadia in a simple way. See how we install Google Chrome stable on Linux Mint 14 Nadia.

Open Terminal and edit the /etc/apt/sources.list

wget -q -O - https://dl-ssl.google.com/linux/linux_signing_key.pub | sudo apt-key add - 


Add the following line to the sources.list file


sudo sh -c 'echo "deb http://dl.google.com/linux/chrome/deb/ stable main" >> /etc/apt/sources.list.d/google.list'


Update Linux Mint


sudo apt-get update

sudo apt-get install google-chrome-stable


Enjoy Google Chrome on Linux Mint 14

Install VirtualBox Extension Pack on a ClearOS 6.3

Install VirtualBox Extension Pack on a ClearOS 6.3

On my previous tutorial, I've show you how to install a headless VirtualBox on a ClearOS 6.3. Now, on this tutorial, I will show you how to install the extension pack. This extension pack is required to enable the remote administration of Virtualbox using RDP or phpvirtualbox.

Steps to install Virtualbox Extension Pack

cd /tmp
wget http://download.virtualbox.org/virtualbox/4.2.4/Oracle_VM_VirtualBox_Extension_Pack-4.2.4-81684.vbox-extpack
VBoxManage extpack install Oracle_VM_VirtualBox_Extension_Pack-4.2.4-81684.vbox-extpack

Make sure you execute the command above using root privilege.

How to install VirtualBox on ClearOS 6.3

How to install VirtualBox on ClearOS 6.3

This tutorial will show you how to install VirtualBox on a ClearOS 6.3 system. Virtualbox can be easily installed on ClearOS 6.3 without a problem. But, you will only see the headless (command mode) of Virtualbox instead of ordinary Virtualbox GUI.

Steps to install Virtualbox on ClearOS 6.3

After ClearOS 6.3 is installed and work properly, you can start installing Virtualbox. I assume you have a good internet connection to do this tutorial. This is the modified version of the original tutorial shown on Howtofoge.com. http://www.howtoforge.com/vboxheadless-running-virtual-machines-with-virtualbox-4.1-on-a-headless-centos-6.2-server

Open Terminal and follow these steps below.

A. Create new admin user

groupadd admin
useradd -d /home/admin -m -g admin -s /bin/bash admin

B. Install Virtualbox

yum groupinstall 'Development Tools'
yum install SDL kernel-devel kernel-headers dkms

In my case, I still need to install gcc manually so I add this command

yum install gcc


How to install Webmin 1.610 on Ubuntu Server 12.10

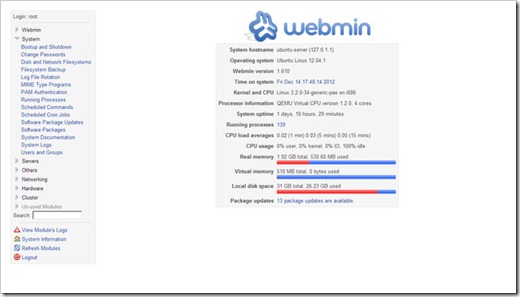
Webmin is a must have application for server administrator. Webmin can help us manage and administer many things on an Ubuntu server via remote web interface. For more information about webmin, please visit the official webmin page. The latest version of Webmin when I write this post is webmin 1.610. It has a better and nicer look compared to previous version.

webmin-ubuntu

How to install Skype on OpenSUSE 12.2

How to install Skype on OpenSUSE 12.2

Now it's the time to install the latest Skype 4.1.0 on OpenSUSE 12.2. Skype 4.1.0 for Linux brings a lot improvements. In order to install Skype on OpenSUSE, please download the latest version of Skype 4.1 for OpenSUSE from this link.

After download, you will have a file called: skype-4.1.0.20-suse.i586.rpm. Now we are ready to install it.

Open Terminal or Konsole and type this command

cd /home/dhani/Downloads      ===== this is the download location

rpm -ivh skype-4.1.0.20-suse.i586.rpm

If you got no errors, Skype is now should be ready. If you tried to install it on OpenSUSE 12.2 on 64bit system, you will get the following error

dhani@linux-m5a4:~/Downloads> rpm -ivh skype-4.1.0.20-suse.i586.rpm
error: Failed dependencies:
        libQtCore.so.4 is needed by skype-4.1.0.20-suse121.i586
        libQtDBus.so.4 is needed by skype-4.1.0.20-suse121.i586
        libQtGui.so.4 is needed by skype-4.1.0.20-suse121.i586
        libQtNetwork.so.4 is needed by skype-4.1.0.20-suse121.i586
        libQtWebKit.so.4 is needed by skype-4.1.0.20-suse121.i586
        libQtXml.so.4 is needed by skype-4.1.0.20-suse121.i586
        libXv.so.1 is needed by skype-4.1.0.20-suse121.i586
        libpng12-0 is needed by skype-4.1.0.20-suse121.i586


To solve it, we need to install those packages first and re execute the rpm -ivh command above.
How to install Guest Additions on Kubuntu 13.04 Alpha 1

On my own experience, Kubuntu 13.04 Alpha 1 can be installed through Virtualbox easily. There was no problem when I tried to install this distro on Virtualbox 4.2.2. As usual, after installing a new distro on my Virtualbox, the next main thing is to install the Guest Additions on the guest system. It's the most important thing since we can get better performance and visualisation after installing Guest Additions. OK here is how to install Virtualbox Guest Additions on Kubuntu 13.04 Alpha 1.

1. Boot the Kubuntu 13.04 Alpha 1 guest machine.

2. Go to Devices | Install Guest Additions on the Virtualbox window

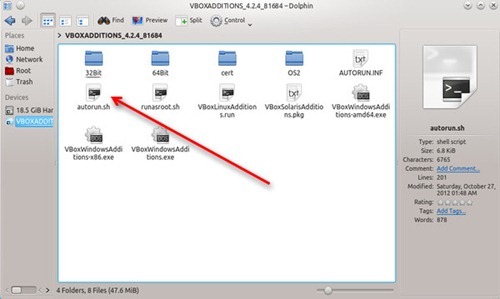
3. If the autorun prompt does not work, you can open or browse the content of the Virtualbox Guest Additions on Kubuntu 13.04.

guest-additions-kubuntu


Kubuntu 13.04 Alpha 1 Screenshots

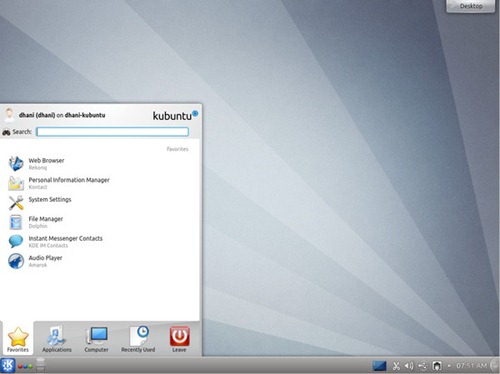
Kubuntu 13.04 with codename Raring Ringtail is now available for testing. Here I just want to share some screenshots of this new Kubuntu 13.04 Raring RIngtail. It's a pretty Linux distribution that is lightweight, beauty and easy to use.

kubuntu-13-04

Kubuntu 13.04 Desktop

Kubuntu 13.04 Raring Ringtail Alpha 1 is now available

The development version of Kubuntu is now reached version 13.04 Alpha 1. This next Kubuntu uses Raring Ringtail as its codename. So, whats new on this Kubuntu 13.04? Technically, there are a lot of improvements have been made to this version but I will not explain here. You may read the full release not of the Kubuntu 13.04 Alpha 1 here.

kubuntu-13-04


Network configuration on Openfiler server

Network configuration on Openfiler server
After installing Openfiler, the first thing to do is to set up and configure the network connection. By setting the correct network connection, we can easily manage the Openfiler server in the future. OK, lets get this thing done. 
1. Login to the web console of the Openfiler server. Type https://192.168.1.1:446 on your web browser. Change the IP address with your Openfiler server IP address.
2. On the web console, click System tab and you will see the network configuration there.

Tutorial How to install Openfiler

Openfiler is a Linux distribution that was designed for network server. We can easily build a powerful file server using Openfiler. This tutorial will show you how to install Openfiler from the beginning. First you must download the ISO file of the latest version of Openfiler. Boot your computer or virtual machine using the ISO file.
On the first screen press Enter to start the installation wizard.

Kategori

Kategori