How to disable SELINUX on Fedora 17

How to disable SELINUX on Fedora 17

How to disable SELINUX on Fedora 17

Just a quick note here, I want to show you How to disable SELINUX on Fedora 17. But in some cases, disabling the SELINUX will cause security issues. Please do this if you are sure and need to. On Fedora 17, open Terminal and execute this command to edit the SELINUX config file
nano /etc/selinux/config
On the SELINUX line, change it to disabled as follow.


# This file controls the state of SELinux on the system.
# SELINUX= can take one of these three values:
#     enforcing - SELinux security policy is enforced.
#     permissive - SELinux prints warnings instead of enforcing.
#     disabled - No SELinux policy is loaded.
SELINUX=disabled
# SELINUXTYPE= can take one of these two values:
#     targeted - Targeted processes are protected,
#     minimum - Modification of targeted policy. Only selected processes are protected.
#     mls - Multi Level Security protection.
SELINUXTYPE=targeted

Now reboot Fedora 17. 

How to add new share on ClearOS 6.3 Server

How to add new share on ClearOS 6.3 Server

This quick tutorial will show you how to add new share on ClearOS 6.3 so it can be accessed from other computers.

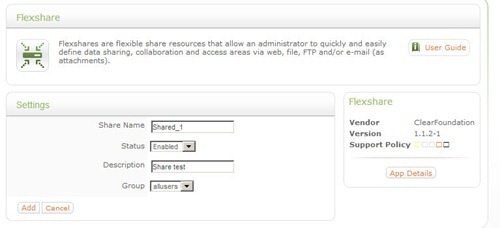
First, login to ClearOS 6.3 web interface and click on Flexshare. On the flexshare tab, press Add and enter the new share folder details as follow

add share


How to install phpvirtualbox on ClearOS 6.3 server

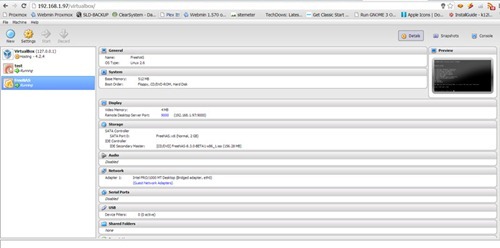
Phpvirtualbox is the web GUI to manage the headless Virtualbox installed on ClearOS 6.3. Read our previous tutorial on how to install virtualbox 4.2 on ClearOS 6.3 server. phpvirtualbox enable us to create, edit, delete or view the guest host console via web browser. It’s a pretty cool to view virtualbox on a web browser.

phpvirtualbox-1

This tutorial is going to show you how to install and configure phpvirtualbox on ClearOS 6.3 server. I assume you have installed the latest Virtualbox 4.2 on ClearOS 6.3.

Login as root.

su

Install Ntop Network Monitoring on Xubuntu 12.10

Install Ntop Network Monitoring on Xubuntu 12.10

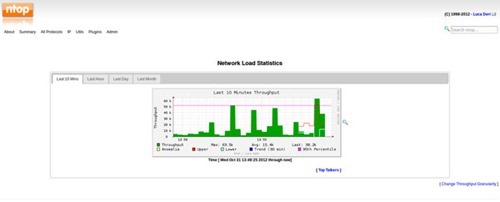
Ntop is a lightweight network monitoring for Linux system which can be installed easily on Ubuntu based Linux such as Xubuntu 12.10. This tutorial will show you how to Install Ntop Network Monitoring on Xubuntu 12.10. I am running Xubuntu 12.10 on my Local Area Network which consist of about 20 computers. Ntop provides detailed information about the LAN traffic and also the internet traffic pretty nicely.

ntop-xubuntu-12.10-3

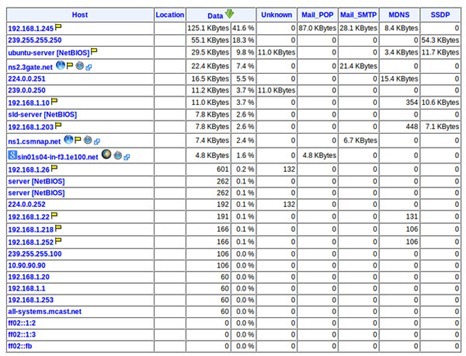
Each hosts on my LAN is listed on its web interface, so we can gain information for each hosts including UDP, TCP data connections, network load etc.

ntop-xubuntu-12.10-4


How to install semanage on CentOS 6.3

How to install semanage on CentOS 6.3

In CentOS or other Red Hat Linux derivatives, if SELinux is enabled and we want to add exception to a given port, we can use the “semanage” command. But, on CentOS 6.3 semanage is not installed by default. We can easily install semanage using the following command:

yum install policycoreutils-python


Dependencies Resolved

================================================================================
Package                     Arch      Version                  Repository
                                                                           Size
================================================================================
Installing:
policycoreutils-python      i686      2.0.83-19.24.el6         base      338 k
Installing for dependencies:
audit-libs-python           i686      2.2-2.el6                base       57 k
libcgroup                   i686      0.37-4.el6               base      102 k
libsemanage-python          i686      2.0.43-4.1.el6           base       80 k
setools-libs                i686      3.3.7-4.el6              base      400 k
setools-libs-python         i686      3.3.7-4.el6              base      210 k
Updating for dependencies:
audit                       i686      2.2-2.el6                base      225 k
audit-libs                  i686      2.2-2.el6                base       60 k
policycoreutils             i686      2.0.83-19.24.el6         base      641 k

Transaction Summary
================================================================================
Install       6 Package(s)
Upgrade       3 Package(s)

Total download size: 2.1 M
Is this ok [y/N]: y

How to install Virtualbox 4.2 on Clear OS 6.3 Server

How to install Virtualbox 4.2 on Clear OS 6.3 Server

ClearOS is a perfect server appliance built on top of CentOS Linux. It has many features such as active directory, LDAP server, file server, gateway and many more. On this tutorial, I will show you how to install Virtualbox 4.2 on ClearOS 6.3.

1. Add RPMForge repository to ClearOS

You can follow this guide to install or enable the RPMForge repository to ClearOS 6.3


2. Install Virtualbox.

Execute these commands as root.

yum groupinstall “Development Tools”
yum install SDL kernel-devel kernel-headers dkms


Local Area (LAN) Messenger using iptux on Ubuntu 12.10

When I was using MS Windows, I found a nice LAN (Local Area Network) Messenger application which can be used to chat and transfer files to other users on the same network. But unfortunately the application is not free. But when I switch to Linux (Ubuntu), I found the similar application called iptux. iptux is a powerful, simple LAN messenger for Linux. The interface of iptux is similar to pidgin (internet messenger). But iptux cannot be used to communicate with other users via internet.


iptux-1

The most beautiful Ubuntu based Linux Distribution on the wild

Hi, see you again on my blog. On this post, I just want to write about my own experiences when trying several Linux distributions. There are many Linux flavors available on the wild but to me, only some of them are comes with a user friendly interface. Here I will give a short review about the most beautiful Linux distribution on the wild that based on Ubuntu. This review is based on my own experiences and no other tendency at all. So, it could be different with you or any other Linux users. 

The most beautiful Linux Distribution 

1. Pear Linux 6
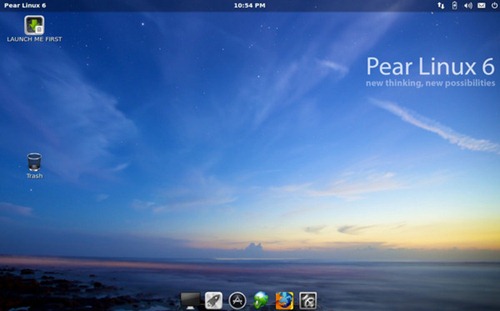
Pear Linux 6 is based on Ubuntu 12.04.1 and it comes with a fresh desktop and dock. Slightly, Pear Linux 6 is more like a Mac OS X. I am not sure if the developer is trying to mimic Mac OS X on this distribution. Pear Linux 6 is beautiful and easy enough for a new Linux users or a switching Windows users. 

Oracle Linux 6.3 Installation Tutorial–Basic Server

This tutorial is going to show you step by step installation of Oracle Linux 6.3 as a basic server. This means, I want to install the Oracle Linux as a server without any GUI or Xserver. It’s a good installation mode for server purposes. For example for file server, web server which does not requires GUI access. OK, now lets prepared.

Steps to install Oracle Linux 6.3 Basic Server

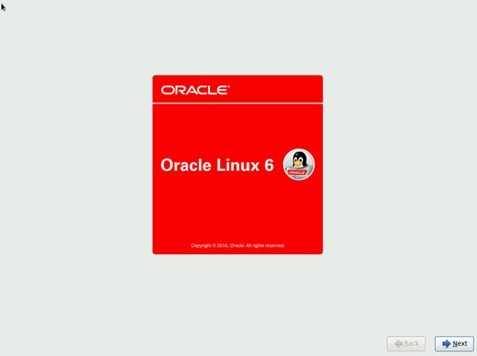
On the first boot select install Oracle and you will see this menu after it. Press next to proceed.


oracle-minimal-install-1


Install Skype on Xubuntu 12.10

Install Skype on Xubuntu 12.10

Hi, see you again on Xubuntu 12.10 tutorial. This time I will show you how to install Skype on my Xubuntu 12.10. Skype is  now listed on Canonical partner repository. So, we can easily add the repository for Skype to Xubuntu 12.10

Steps to install Skype on Xubuntu 12.10

Add the repository
sudo add-apt-repository "deb http://archive.canonical.com/ $(lsb_release -sc) partner"

Install Java Runtime Environment on Xubuntu 12.10

Install Java Runtime Environment (JRE) on Xubuntu 12.10

This tutorial will guide you to the process of install Java Runtime Environment (JRE) on Xubuntu 12.10 system. The latest version of Oracle Java JRE can be obtained here. This tutorial will install Java on system and also create symbolic link java library. In other word, we will also enable the Java plugin for Mozilla Firefox, Google Chrome and other web browser under Xubuntu 12.10. I am sorry but I am no the fan of OpenJDK JRE. I think Oracle Java is better than OpenJDK. :) 
OK. Lets get started. 
First, use this link to download the latest available Java package for your computer (32 bit or 64 bit). In this tutorial, I am using the jre 7 update 9 for Linux 32 bit (tar.gz). Save the file jre-7u9-linux-i586.tar.gz to your computer.
Next, extract the file using command. Change the command if you have newer or any other java version.
tar xzvf jre-7u9-linux-i586.tar.gz

How to play MP3 and DVD video on Xubuntu 12.10

How to play MP3 and DVD video on Xubuntu 12.10

How to play MP3 and DVD video on Xubuntu 12.10

By default, we cannot play MP3 or DVD movie on standard installation of Xubuntu 12.10. We need to install additional packages in order to play MP3 and some others audio video formats on Xubuntu 12.10. Xubuntu, as well Ubuntu does not includes the multimedia codecs to play MP3. But we can easily install ubuntu-restricted-extras to enable supports to various audio and audio file formats. This command will also install flash player on Xubuntu 12.10 as well.
sudo apt-get install ubuntu-restricted-extras
After the installation finished, you can start playing your favorite MP3 and other video formats on Xubuntu 12.10. Enjoy.
How to enable RPMForge repo on ClearOS 6.3

How to enable RPMForge repo on ClearOS 6.3

How to enable RPMForge repo on ClearOS 6.3

This short tutorial will show you how to install or enable the RPMForge repository on ClearOS 6.3. ClearOS is a CentOS based Linux so, it RPMForge can be setup easily. In order to setup the RPMForge on ClearOS, follow these instructions below:

Open Terminal and do the following.

wget http://packages.sw.be/rpmforge-release/rpmforge-release-0.5.2-2.el6.rf.i686.rpm
rpm --import http://apt.sw.be/RPM-GPG-KEY.dag.txt
rpm –i rpmforge-release-0.5.2-2.el6.rf.i686.rpm

Now RPMForge is enabled on ClearOS and we can start using it right away.

How to install XBMC Media Center on Xubuntu 12.10

How to install XBMC Media Center on Xubuntu 12.10

This tutorial is going to show you how to install XBMC Media Center on Xubuntu 12.10 Quantal Quetzal. XBMC is a free and powerful application that will turn your Xubuntu 12.10 into a rich features multimedia center for your home. For more information about XBMC and its features, please visit the official website of XBMC

How to install Truecrypt on CentOS 6.3

How to install Truecrypt on CentOS 6.3

This tutorial is going to show you how to install Truecrypt on CentOS 6.3. Truecrypt is a powerful utility that can help you to encrypt file or folder or even a partition easily. Truecrypt comes with a simple and easy to use user interface.

Steps to install Truecrypt on CentOS 6.3

1. Download Truecrypt package. Or use wget instead

wget http://www.truecrypt.org/download/truecrypt-7.1a-linux-x86.tar.gz

2.  Now extract the package

tar xzvf truecrypt-7.1a-linux-x86.tar.gz


How to install Google Chrome on CentOS 6.3

How to install Google Chrome on CentOS 6.3

How to install Google Chrome on CentOS 6.3

This quick tutorial is going to show you how to install Google Chrome on CentOS 6.3. This also applied for CentOS 6.2 as well. By installing Google Chrome via YUM repository, we can get future update easily.  First, we need to add Google Chrome repository to CentOS 6.3.

Edit or create new file on /etc/yum.repos.d/google-chrome.repo. You can do this by invoking this command as root

nano /etc/yum.repos.d/google-chrome.repo

Now paste the following lines

for 32bit system:

[google-chrome]
name=google-chrome - 32-bit
baseurl=http://dl.google.com/linux/chrome/rpm/stable/i386
enabled=1
gpgcheck=1
gpgkey=https://dl-ssl.google.com/linux/linux_signing_key.pub

How to install Ubuntu Tweak 0.8.1 on Ubuntu 12.10

How to install Ubuntu Tweak 0.8.1 on Ubuntu 12.10

After a shocking announcement of the discontinued of Ubuntu Tweak development, now Ubuntu Tweak fans can breath again. Chou, the Ubuntu Tweak developer is back and promise will continue the development on Ubuntu Tweak. This tutorial is going to show you how to install Ubuntu Tweak 0.8.1 on Ubuntu 12.10 Quantal Quetzal. The new version of Ubuntu Tweak 0.8.1 is now ready and supports Ubuntu 12.10.

Steps to install Ubuntu Tweak on Ubuntu 12.10

Add the official Ubuntu Tweak PPA repository. Edit the /etc/apt/sources.list and add the following lines:
deb http://ppa.launchpad.net/tualatrix/ppa/ubuntu quantal main
deb-src http://ppa.launchpad.net/tualatrix/ppa/ubuntu quantal main 

Install Cairo Dock 3.1.0 on Ubuntu 12.10

Install Cairo Dock 3.1.0 on Ubuntu 12.10

Install Cairo Dock 3.1.0 on Ubuntu 12.10

This tutorial is going to show you how to install the latest stable version of Cairo Dock 3.1.0 on Ubuntu 12.10 Quantal Quetzal. This new Cairo Dock 3.1.0 comes with many improvements.
Here are some new features included on Cairo Dock 3.1.0. 
  • Better integration of Unity: support of the Launcher API and better support of indicators
  • All configuration windows have been merged into a single one.
  • Added progress bars in several applets and in the Dbus API
  • The Music Player applet can control players in the systray.
  • Icons of the taskbar can be separated from launchers or not
  • The advanced mode of the configuration panel has been improved (thanks to SQP!)
  • Messaging Menu has been rewritten for newer versions and two new 'indicator' applets have been added:
    • Printers-Menu: it shows active print jobs.
    • and Sync-Menu: e.g. on Ubuntu 12.10, it collects status information data from processes that involve some form of synchronisation with servers; such as about apps like Ubuntu One.
  • And as always ... various bug fixes and improvements

Install Flash Plugin on Ubuntu 12.10 Quantal Quetzal

How to Install Flash Plugin on Ubuntu 12.10 Quantal Quetzal

This tutorial is going to show you how to Install Flash Plugin on Ubuntu 12.10 Quantal Quetzal. Flash Plugin is a must have application for Ubuntu users. Flash plugin is required by Firefox and Google Chrome to play rich multimedia contents such as playing YouTube videos etc. In order to install Flash Plugin on Ubuntu 12.10 you can do the following steps.
A. Enable the multiverse repository 
Make sure you enable the multiverse repository from Software Sources. 

How to install Deepin Software Center on Kubuntu 12.10

How to install Deepin Software Center on Kubuntu 12.10

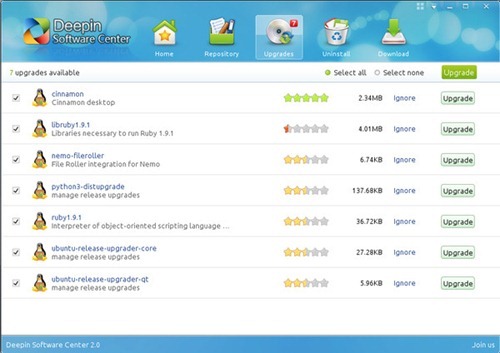
To install or uninstall software on Kubuntu 12.10, you can use the default Software Center on Kubuntu 12.10. But, if you need a fancy one, I recommend you to install the Deepin Software Center on Kubuntu 12.10. Deepin Software Center is a simple, nice looking and easy to use software manager. See the screenshots of my Deepin Software Center on my Kubuntu 12.10

deepin-software-center-1

How to install Skype 4.0.0.8 on Mandriva 2012

How to install Skype 4.0.0.8 on Mandriva 2012

This tutorial is going to show you how to install Skype on Mandriva 2012. Current version of Skype for Linux is 4.0.0.8. Skype is available in various platform and on this tutorial, I am trying to install Skype on Mandriva 2012 using the dynamic version. I am not sure what is the differences between dynamic, static and other packages. Skype is the most popular VoIP app for Linux which lets us make free phone calls, chat, video chat, send files to our skype friends. 

Steps to install Skype on Mandriva 2012

1. Download Skype package
You can obtain the Skype dynamic package from this link: http://download.skype.com/linux/skype-4.0.0.8.tar.bz2

Linux for Beginner:Introduction to Deepin Linux 12.06 part 1

Switching from Windows to Linux now made easier with the release of some user oriented Linux such as Deepin Linux 12.06, an Ubuntu based Linux which is nice and good for a new Linux users. Here I will try to give a quick walkthrough to the new Deepin Linux 12.06. The Deepin Linux 12.06 desktop features a clean Gnome 3 interface. Many applications in several categories are included on this Linux.

How to open installed software on Deepin Linux

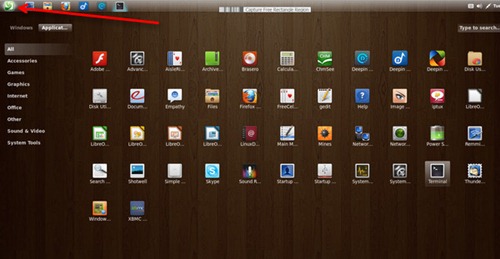
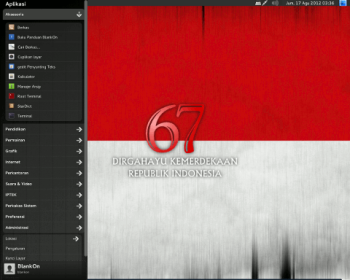
If you want to open installed software on Deepin Linux 12.06, move your cursor to the top left of your desktop. Click the Deepin Logo. Click the Application tab to see the software in several categories.

deepin-1

Configure NFS Server on FreeNAS 8.3.0

This quick tutorial is going to show you how to configure NFS Server on FreeNAS 8.3.0. Network File System (NFS) is a distributed file system protocol originally developed by Sun Microsystems in 1984,[1] allowing a user on a client computer to access files over a network in a manner similar to how local storage is accessed. NFS, like many other protocols, builds on the Open Network Computing Remote Procedure Call (ONC RPC) system. (Wiki) FreeNAS has a built in tool that help us to configure the NFS Server easily.

Steps to Configure NFS Server on FreeNAS 8.3.0

1. Login to FreeNAS web config GUI

2. Go to Services and turn ON the NFS service from that page.

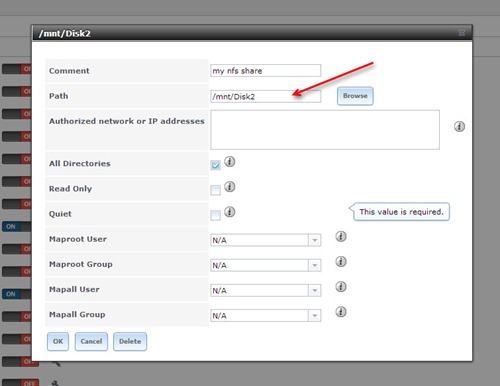
3. Now go to Sharing >> Unix(NFS)Share>>Add Unix (NFS) Share

nfs-server


Why Ubuntu Tweak development stops?

I just read  a news on Softpedia about the surprising Ubuntu Tweak development stop. I was thinking why Ubuntu Tweak development stops mysteriously. Is it because of further funding problems? There are no clear information left by the developer before he made this decision but here is the last word we can read from the official blog.

ubuntu-tweak-stop

“You may ask why I made this decision to stop the development of Ubuntu Tweak, I may write 10,000 words to describe how I start this project, how I feel happy from this project, how I feel bad from this project…But I just want to say: If making free software is not free any more, why still doing this?” stated the developer on his blog.

I regret this decision personally but this is his decision. He build this project from zero until now. He felt it was not  worth anymore to continue the project. So, thank you and good luck for you, Ubuntu Tweak developer.

5 Things I do after installing Kubuntu 12.10

5 Things I do after installing Kubuntu 12.10

I do love Kubuntu 12.10 for both the user interface/experiences and the overall performance. With the power of Ubuntu 12.10 and the easiness of KDE. As far as I know, Kubuntu could be the most user friendly desktop Linux at the moment. And after I installed Kubuntu 12.10 on my system, here are 5 things I do. This article is suitable for general Linux desktop users not for network administrator or multimedia enthusiast.

1. Install Flash Plugin on Kubuntu 12.10

Since Kubuntu 12.10 does not equipped with flash plugin or flash player by default, I need to install it on my Kubuntu 12.10. Read this post on how to install flash plugin on Kubuntu 12.10 if you want.

2. Install Google Chrome

I do not like the default web browser on Kubuntu (Rekonq) or even the Mozilla Firefox. I prefer Google Chrome as my web browser to handle all my web browsing activities. Google Chome has a simple interface and works perfectly on Kubuntu. Read how to install Google Chrome on Kubuntu 12.10

Install Oracle Java 7 Update 9 on Kubuntu 12.10

This tutorial is going to show you how to Install Oracle Java 7 Update 9 on Kubuntu 12.10. Java is a must have application for Linux users. Enrich your browsing activity with Oracle Java 7 update 9. If you still use the older version of Oracle Java, I recommend you to upgrade to this new release.

Steps to install Oracle Java 7 on Kubuntu 12.10

1. Download Oracle Java 7 update 9 for Linux. For more options for downloading Java, please visit this page: http://java.com/en/download/manual.jsp#lin

2. Extract the package we’ve just downloaded


tar xzvf jre-7u9-linux-i586.gz


It will produces a new directory


jre1.7.0_09


Tutorial how to install PlayonLinux on Kubuntu 12.10

PlayOnLinux is a special application for Linux that can be used to help us to install and run many Windows software on Linux. PlayOnLinux is related to Wine in term of program similarity and other factors. PlayOnLinux offers better and easier way to install Windows software on Linux. We can browse the software we want to install or simply provide the executable file.

playonlinux-kubuntu-1

Steps to install PlayOnLinux on Kubuntu 12.10.


Create Kubuntu 12.10 Live USB from Windows

Create Kubuntu 12.10 Live USB from Windows

There are many applications to create Linux Live USB such as Unetbootin, YUMI, Linux Live USB Creator and some others. But on this case, I highly recommend you (the Windows users) to create Kubuntu 12.10 Live USB using Linux Live USB (LiLi). I have been testing to create Kubuntu 12.10 Live USB with Linux Live USB creator and I can enable the persistent mode on it. It’s a good applications for Windows users that wants to try Linux but don’t want to install on the hard disk.

Steps to create Kubuntu 12.10 Live USB

  • Open Linux Live USB (LiLi). You can download Linux Live USB latest version if you don’t have it. 
  • Choose your USB flash disk from the list. At this point, you must plugged your USB in already
  • Choose a source. It can be ISO, CD or you can directly download from the internet.
  • Set the Persistent mode. You can specify the amount of the persistent space by moving the slider.
  • Finally, press the lightning button to start create Kubuntu 12.10 Live USB.

This method has been tested by me and I can run my Kubuntu 12.10 Live USB with persistent mode. I can save my files and the settings on Kubuntu into the flash disk. Thank you I hope this post is useful for you.

How to install Cinnamon on Kubuntu 12.10

My first question after installing Kubuntu 12.10 was can I install Cinnamon on Kubuntu 12.10? The answer is YES. We can easily install Cinnamon 1.6.2 on Kubuntu 12.10. This tutorial is going to show you how to install Cinnamon on Kubuntu 12.10. Cinnamon is a pretty desktop for Linux and Cinnamon is may favorite desktop manager currently.

install cinnamon on kubuntu

Steps to install Cinnamon 1.6.2 on Kubuntu 12.10

1. Edit file /etc/apt/sources.list and add the following lines:

deb http://ppa.launchpad.net/gwendal-lebihan-dev/cinnamon-stable/ubuntu quantal main
deb-src http://ppa.launchpad.net/gwendal-lebihan-dev/cinnamon-stable/ubuntu quantal main


Kubuntu 12.10 Screenshots Preview

Kubuntu 12.10 Screenshots Preview

Personally I do love the new interface of Kubuntu 12.10. Its a pretty cool Linux distribution. The font, wallpaper and all other designs are match, easy to use. Hmm....perfecto. Kubuntu is based on Ubuntu but Kubuntu 12.10 is way better than Ubuntu 12.10 itself, at least for me. Here are some Kubuntu 12.10 screenshots.
Kubuntu 12.10 Desktop
Akhirnya Kubuntu 12.10 bisa full screen di Virtualbox 4.2.2

Akhirnya Kubuntu 12.10 bisa full screen di Virtualbox 4.2.2

Setelah mengalami kebingungan sejenak ketika menginstall Kubuntu 12.10 di Virtualbox 4.1.22, kini Kubuntu 12.10 saya bisa berfungsi dan berjalan dengan sempurna di Virtualbox 4.2.2. Apabila anda install Kubuntu 12.10 di Virtualbox versi lebih lama dari 4.2.2, kemungkinan anda tidak bisa full screen dan mendapatkan resolusi lebih tinggi dari 1024 x 798 dan Kubuntu tidak bisa auto resize ketika window Virtualbox di resize.

How to install Opera 12.02 on Kubuntu 12.10

How to install Opera 12.02 on Kubuntu 12.10

This tutorial is going to show you how to install Opera 12.02 on Kubuntu 12.10. Opera is a fast web browser for Linux and its a good alternative to Google Chrome of Mozilla Firefox. I am going to show you how to install Opera 12.02 on Kubuntu 12.10 using command line. 

Steps to install Opera 12.02 on Kubuntu 12.10

1. Download Opera 12.02 Deb package
wget http://get-ice-1.opera.com/pub/opera/linux/1202/opera_12.02.1629_i386.deb

How to install Flash Plugin on Kubuntu 12.10

How to install Flash Plugin on Kubuntu 12.10

Kubuntu 12.10 does not equipped with flash plugin by default. We need to install the flash plugin on Kubuntu 12.10 manually. Don't worry, I am going to show you how to install Flash Plugin on Kubuntu 12.10. Flash plugin is an essential additional software needed to play multimedia content on Kubuntu and other Linux. Without flash, you won't be able to play YouTube video on Kubuntu 12.10

Steps to install Flash Plugin on Kubuntu 12.10

1. Enable Multiverse repository on Kubuntu
flashplugin-installer is located on multiverse repository. So, make sure the multiverse repo is enabled on Kubuntu 12.10. Open Muon Package manager >>Settings>>Configure Software Source. Tick the multiverse repo on that page to enable. Press close to reload.
How to install Google Chrome on Kubuntu 12.10

How to install Google Chrome on Kubuntu 12.10

This tutorial is going to show you How to install Google Chrome on Kubuntu 12.10 via Google repository. The benefit of using Google repository is we can easily get the updated version of Google Chrome in the future. Also, the dependency files will be automatically resolved and installed on Kubuntu 12.10.

Steps to install Google Chrome on Kubuntu 12.10

1. Add Google repository to Kubuntu 12.10. To add Google repo to Kubuntu 12.10, edit the file /etc/apt/sources.list and add the following line to it
Guest Additions on Kubuntu 12.10 errorโ€“Fixed

Guest Additions on Kubuntu 12.10 error–Fixed

I was installing Kubuntu 12.10 on Virtualbox 4.1.22 and then I tried to install Virtualbox Guest Additions on Kubuntu 12.10 but I cannot get any better resolution greater than 1024 x 798. Actually the Guest Additions can be installed but cannot get the resolution working. Now, after I install the latest Virtualbox 4.2.2, this problem was fixed. So, the I can now run my Kubuntu 12.10 in seamless mode, and auto resize screen resolution.

Uncomplete Guest Additions installation on Kubuntu 12.10

Hi, I just show you how to install Kubuntu 12.10 on a Virtualbox. By default, Kubuntu 12.10 does not equipped with Virtualbox Guest Additions. So, after we install it on Virtualbox we need to install the guest additions manually. I was trying to install Guest Additions on my Kubuntu 12.10 using the standard Kubuntu guest addition installation procedures. The result is as follow:

The guest additions is installed without problems but at the end of the message, I got a confirmation like this:

Unknown version of X window system installed. Not installing X window system driver

I installed guest additions on Kubuntu using the following method. Did I miss something here?.

Steps to install Guest Additions on Kubuntu 12.10

1. Open Terminal and install build-essential

sudo apt-get install build-essential module-assistant
sudo m-a prepare;

2. Now mount the Virtualbox Guest Additions. Go to Devices >> Install Guest Additions. Open Dolphin and open the mounted virtualbox guest additions medium. See illustration below.
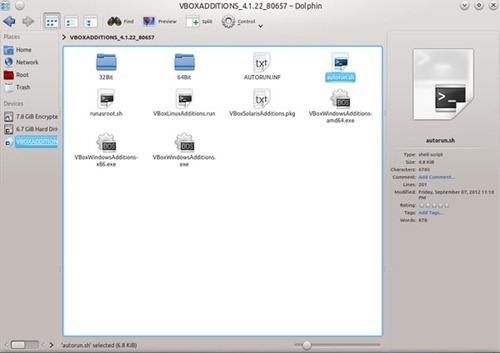
guest-additions-kubuntu-1

3. Now, click autorun.sh and provide your root password to continue.

Maybe I need to wait until the new version of Virtualbox is released.

Kubuntu 12.10 Installation Tutorial

The new version of Kubuntu 12.10 Final release is available. Here I will show you how to install Kubuntu 12.10 step by step. Kubuntu 12.10 is a pretty nice Linux for desktop. I think Kubuntu team have done pretty well job here. I like the clean interface, nice and crisp icons and fonts selection. 

Steps to install Kubuntu 12.10

1. Boot your computer using Kubuntu 12.10 ISO. You can create a Live USB if you want to save a CD. 
2. On the first boot screen select Install Kubuntu or Try Kubuntu and we install from desktop.
Download Xubuntu 12.10

Download Xubuntu 12.10

Xubuntu 12.10 is now available for download. Here we provide the direct download link  for the Xubuntu 12.10 ISO. Xubuntu is an Ubuntu based Linux distribution with Xfce desktop manager. Xubuntu 12.10 Quantal Quetzal is a lightweight and fast Linux distribution that can be installed on a low power PC or notebook.

Xubuntu 12.10 features the following:

  • Xubuntu now uses Xfce 4.10 (up from 4.8 in previous release)
  • Completely rewritten offline documentation
  • In the application menu, all settings-related launchers are now grouped under the Settings Manager
  • Updated artwork, including new wallpaper, documentation looks and updates to LightDM, Greybird and Ubiquity slideshow

Download Xubuntu 12.10 ISO

Ubuntu 12.10 Final Release

Another good news for Ubuntu lovers and Linux fans in general. The new Ubuntu 12.10 Final version is now available for download. Ubuntu 12.10 with codename Quantal Quetzal is the latest stable version of Ubuntu, the most popular Linux distribution. Ubuntu 12.10 introduces innovations that bring together desktop and cloud-based experiences, representing the next stage in the transition to a multi-device, cloud-based world. As always Ubuntu available for both 32 bit and 64 bit computer.

ubuntu 12.10 final


How to fix error Metadata file does not match checksum on Oracle Linux 6.3

I was trying to install a package on my Oracle Linux 6.3. The system is updating the repository but at the end of the process I got the following process: Metadata file does not match checksum. Trying another mirror. But as a result, I cannot continue to install any packages.


metadata error

I’ve tried to fix it using command

yum clean metadata

But this problem exist. How can I fix this??

Pear Linux 6 Final Version is out

Good news for Pear Linux fans. The latest stable version of Pear Linux 6 is now out. Please welcome the new Pear Linux 6 Final Version. Personally, Pear Linux 6 is the most beautiful Linux distribution ever made. Its very easy to use, easy to install software, and looks great. I prefer Pear Linux than any other big distro such as Ubuntu, CentOS, Fedora.

pear-linux-6-final


How to install VLC Media Player on Pear Linux 6

This is a quick tutorial to install VLC Media Player on Pear Linux 6. The new version of VLC 2.0.4 is now available for several operating systems. We can easily install VLC on Pear Linux via command line or via Pear AppStore.

Requirements:

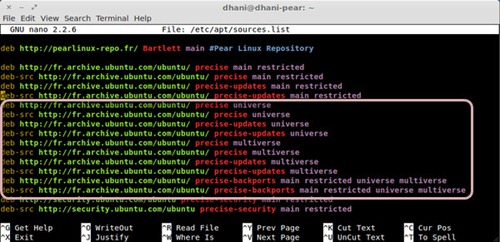
In order to install VLC on Pear Linux 6 we need to enable the universe repository first. Open /etc/apt/sources.list to enable the universe repository.

sudo nano /etc/apt/sources.list

Remove the # sign next to universe repository.

vlc on pear


How to install Virtualbox 4.2 on Oracle Linux 6.3

How to install Virtualbox 4.2 on Oracle Linux 6.3

This tutorial is going to show you how to install Virtualbox 4.2 on Oracle Linux 6.3. Since Oracle is an RPM based Linux, we can use the Virtualbox RPM version to be installed on Oracle. Oracle itself is a powerful Linux distribution for both server and desktop.

Steps to install Virtualbox on Oracle Linux 6.3

1. Download Virtualbox 4.2 on Oracle Linux 6.3

Install Cinnamon on Xubuntu 12.04

Install Cinnamon on Xubuntu 12.04

Install Cinnamon on Xubuntu 12.04

I was trying to Install Cinnamon on Xubuntu 12.04. Cinnamon is currently my favorite desktop environment on Linux better than Gnome 3 or Unity. I am not sure if this method will success installing Cinnamon on Xubuntu. I was successfully installed Cinnamon 1.6 on my Ubuntu 12.04 and Fedora 16 as well.

This is the way I install Cinnamon on Xubuntu 12.04

Step 1. Add Cinnamon repository to the system. Edit /etc/apt/sources.list first.
nano /etc/apt/sources.list
And add the following lines to it
deb http://ppa.launchpad.net/gwendal-lebihan-dev/cinnamon-stable/ubuntu precise main
deb-src http://ppa.launchpad.net/gwendal-lebihan-dev/cinnamon-stable/ubuntu precise main 
Step 2. Update system
sudo apt-get update

BlankON 8.0 Sajadah is now available

Good news for Indonesian Linux community. The new version of the most popular Linux distribution in Indonesia, BlankON 8.0 is now available for download. BlankON 8.0 with code name Sajadah is a Debian based Linux which is modified and equipped with several moslem applications such as QiOO - Al Quran in LibreOffice; Zekr - Al Quran translations and voice Tartil online; Minbar - prayer time reminder.

blankon 8 sajadah


How to manage Headless Virtualbox using phpvirtualbox on Ubuntu Server

On our previous tutorial, I already show you how to install Virtualbox on an Ubuntu Server. Now, I want to share how to manage the headless virtualbox on Ubuntu Server using phpvirtualbox. As a result we will have an ordinary Virtualbox interface on a web browser.
In order to manage Headless Virtualbox using phpvirtualbox on Ubuntu Server, follow these steps below. I assume you already installed Virtualbox on Ubuntu Server.

Ylmf OS 5 Beta Screenshots

Ylmf OS 5 Beta 4 is now available. Here we want to share some Ylmf OS 5 Beta Screenshots with you. Ylmf 5 is a nice and beauty Linux distribution that developed by Chinese community. It's interface looks like Windows and so its pretty easy to use. I cannot go any further to discuss this Ylmf OS on this blog since its uses Chinese as the main language, server etc.

Check out some screenshots of Ylmf OS 5 Beta version


ylmf-os-5-screen-3

How to install Virtualbox on Ubuntu Server 12.04

How to install Virtualbox on Ubuntu Server 12.04

In this tutorial I am going to show you How to install Virtualbox on Ubuntu Server 12.04. Ubuntu Server does not equipped with a Desktop environment or GUI so Virtualbox will also run as a headless virtualbox. But, still we can use Virtualbox to create and manage virtual machines via command line. OK lets get started. 

Steps to install Virtualbox on Ubuntu Server 12.04

Step 1. Open and edit /etc/apt/sources.list. Add the following line to it
deb http://download.virtualbox.org/virtualbox/debian precise contrib
Step 2. Add the Virtualbox public key
wget -q http://download.virtualbox.org/virtualbox/debian/oracle_vbox.asc -O- | sudo apt-key add -
Step 3. Update system
apt-get update
Step 4. Install Virtualbox and dependency files
apt-get install linux-headers-$(uname -r) build-essential virtualbox-4.2 dkms
Make sure you have a good internet connection since the command above will download some packages from the internet. 

How to install Virtualbox on OpenSUSE 12.3

How to install Virtualbox on OpenSUSE 12.3

How to install Virtualbox on OpenSUSE 12.3

This quick tutorial is going to show you How to install Virtualbox on OpenSUSE 12.3. Its pretty easy to install Virtualbox 4.2 on OpenSUSE 12.3. If you are OpenSUSE 12.3 users, you may follow this tutorial below to install Virtualbox on OpenSUSE 12.3
Step 1. Download Virtualbox 4.2 for OpenSUSE
Step 2. Virtualbox requires linpng.so.0 to install. So we need to install this package first.
su 
zypper in libpng12.so.0

How to install Cinnamon on Fedora 16

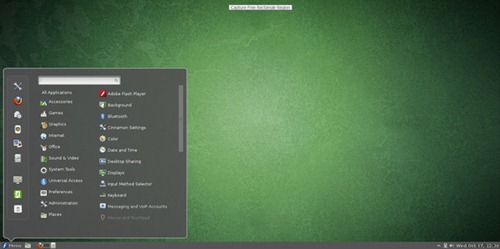
I have a Fedora 16 running on my Virtualbox. I want to install Cinnamon onto it and replace the default Gnome Shell on my Fedora 16. Its pretty much easy to install Cinnamon on Fedora 16. See my screnshots of the Fedora 16 running Cinnamon below:

cinnamon-fedora-16 1

How to disable SELINUX on Fedora 16

How to disable SELINUX on Fedora 16

This tutorial will show you how to disable SELINUX on Fedora 16. I am not sure if disabling SELINUX on Fedora 16 will affect the system security. Sometimes I need to disable selinux because of some reasons. After disabling SELINUX on Fedora 16 virtual machine, I can get Gnome Shell and Cinnamon running on my Fedora 16 VM via Virtualbox. For detailed information about Fedora SELINUX, please visit this page: http://docs.fedoraproject.org/en-US/Fedora/13/html/Security-Enhanced_Linux/

Steps to disable SELINUX on Fedora 16

How to install Spotify on Ubuntu 12.04

How to install Spotify on Ubuntu 12.04

This quick Ubuntu tutorial will show you how to install Spotify on Ubuntu 12.04. Spotify is a nice multimedia applications that can be used to play online music for free. If you are new to Spotify, you can read this page to know more about Spotify.

Steps to install Spotify on Ubuntu 12.04

In order to install Spotify on Ubuntu 12.04, first we need to add the Spotify repository to the Ubuntu system. Edit the file /etc/apt/sources.list and add the following line
deb http://repository.spotify.com stable non-free
Next execute this command to add the gpg key
sudo apt-key adv --keyserver keyserver.ubuntu.com --recv-keys 94558F59

How to install Virtualbox on Pear Linux 6

How to install Virtualbox on Pear Linux 6

This tutorial will show you how to install Virtualbox on Pear Linux 6. Virtualbox can be installed and run on Pear Linux 6 without problems if you install it using the right way. Virtualbox is a free virtualization software that can be used to run multiple operating systems (virtual machine) on a host machine.
Objective:
  • Download Virtualbox for Linux
  • Install Virtualbox on Pear Linux 6

Steps to install Virtualbox on Pear Linux 6

Step 1. Download Virtualbox .deb package for Linux

GParted Live 0.14 Screenshots & Review

GParted Live 0.14 Screenshots & Review

I just downloaded the new version of GParted Live 0.14.0-1 ISO file and boot it on my Virtualbox. Now I want to share some screenshots and a quick review of this new GParted Live 0.14. GParted is a powerful Linux distribution to manage disk partition. The look of this GParted Live 0.14 seems oldiest but that's not the point. GParted Live is a system administration Linux so the look and style is not a priority. But to me, its fine. Simple and usable. 

How to integrate Google Search into Gnome Terminal on Ubuntu

How to integrate Google Search on Gnome Terminal on Ubuntu

I love Gnome Terminal which has the power of the command line on my Ubuntu box. I use Gnome Terminal to do many administrative tasks such as install or uninstall software, modify the configuration settings for Samba etc. But did you know that we can integrate the Google Search into Gnome Terminal? In other words, we can search on Google with the text we typed on the Terminal. Its pretty interesting right?
Try the following to integrate Google Search into Gnome Terminal on Ubuntu
sudo add-apt-repository ppa:tualatrix/personal
sudo apt-get update
sudo apt-get install gnome-terminal

How to create new virtual machine on Virtualbox

This tutorial will show you How to create new virtual machine on Virtualbox. Before we can install and power up a virtual machine on host machine, we must create it first.

To create a new virtual machine on Virtualbox, follow these steps.

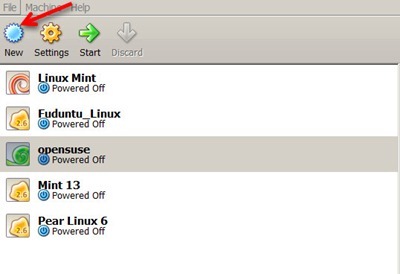
Step 1. Press New icon on the top left of the Virtualbox window.

new virtual machine 1

Step 2. The new virtual machine wizard will be opened. Press Next to continue.

Step 3. Type the name of the new virtual machine. For example I type Ubuntu for my new Virtual machine. Also we need to specify the Operating System and Version. Press Next

How to install CentOS 6.3 using Netinstall

How to install CentOS 6.3 using Netinstall

This tutorial is going to show you How to install CentOS 6.3 using Netinstall. There are several ways to install CentOS 6.3. If you have a fast internet connection, install CentOS 6.3 using Netinstall could be a good way. We only need to download the CentOS 6.3 NetInstall ISO file and it will download most part of the files from the internet when the install process is ongoing. 
How to install CentOS 6.3 using Netinstall

How to know the Linux Mint version installed on our PC

This tutorial will show you How to know the Linux Mint version installed on our PC. Sometimes, I got a notebook or PC with Linux Mint installed on the system. But I do not know which Linux Mint version is currently running on the system. We need to find out the Linux Mint version installed on the PC in order to do some advanced treatments. 
To know the Linux Mint version installed, simply open Terminal and use the following command
cat /etc/issue
or 
cat /etc/lsb-release

Download Evernote for Ubuntu DEB-NixNote

This is the newest version of Evernote for Ubuntu Linux. This is the new version of NixNote 1.4, a nice application for Linux that well known as an Evernote clone. It has almost the same features and performance as Evernote. To download NixNote 1.4 for Ubuntu (DEB), please use the following link.

Download Evernote-NixNote 1.4 for Ubuntu DEB
Install Virtualbox 4.2 on CentOS 6.2 using YUM

Install Virtualbox 4.2 on CentOS 6.2 using YUM

Install Virtualbox 4.2 on CentOS 6.2 using YUM

This tutorial will show you how to Install Virtualbox 4.2 on CentOS 6.2 using YUM. Installing Virtualbox using YUM or official repository is much better than installing from an RPM package. We can get future update of Virtualbox easily. 

Steps to Install Virtualbox 4.2 on CentOS 6.2 using YUM

Open Terminal and type this command
su
cd /etc/yum.repos.d
wget http://download.virtualbox.org/virtualbox/rpm/rhel/virtualbox.repo
It is recommended to update your system to make sure you have latest packages installed including the Linux Kernel.
yum update
Install Google Chrome on CentOS 6.2 using YUM

Install Google Chrome on CentOS 6.2 using YUM

Install Google Chrome on CentOS 6.2 using YUM is pretty much easier and is recommended for CentOS users. By installing Google Chrome on CentOS 6.2 using YUM, we can get future update easier using update method on CentOS. This tutorial is going to show you how to Install Google Chrome on CentOS 6.2 using YUM. By default, CentOS 6.2 is equipped with Firefox web browser. But, because I am a fans of Google Chrome, thats why I want to install the latest Google Chrome on CentOS 6.2.

Steps to Install Google Chrome on CentOS 6.2 using YUM

How to install Ubuntu Tweak 0.8 on Ubuntu 12.04

This tutorial will show you How to install Ubuntu Tweak 0.8 on Ubuntu 12.04. Ubuntu Tweak is a powerful tool that give you access to several system settings on Ubuntu 12.04. You can clean up your system, install new software, change the advanced appearances and many more. Installing Ubuntu Tweak 0.8 on Ubuntu 12.04 is not hard.

Steps to install Ubuntu Tweak 0.8 on Ubuntu 12.04

Step 1. Add the Ubuntu Tweak repository. Open Terminal and paste this command to add Ubuntu Tweak repository to Ubuntu 12.04

sudo add-apt-repository ppa:tualatrix/ppa

Install Fast Burst Camera App for Samsung Galaxy S3

Install Fast Burst Camera App for Samsung Galaxy S3

Improve the Samsung Galaxy S3 performance with this Android application. Fast Burst Camera will help you to take multiple photos up to 30 photos per second on Samsung Galaxy S3. Samsung Galaxy S3 is supported with multi burst photo taking features but this Fast Burst Camera will improve it significantly. Fast Burst Camera is not free but it worth to install this app on Samsung Galaxy S3. 

Cannot install Guest Additions on OpenSUSE 12.3

Cannot install Guest Additions on OpenSUSE 12.3

OpenSUSE 12.3 is now available for testing. I was installing OpenSUSE 12.3 on my Virtualbox 4.2 and it works well. But I cannot install Guest Additions on OpenSUSE 12.3 due to missing or mismatched Kernel devel on OpenSUSE 12.3. Also, OpenSUSE 12.3 uses newer gcc version which is not compatible with Virtualbox 4.2. I don't know how to fix this issue. I hope this issue will be fixed on the next version of OpenSUSE 12.3 prior to Alpha 1. 

Tutorial install Gnome Shell 3.6 on Ubuntu 12.04

Tutorial install Gnome Shell 3.6 on Ubuntu 12.04

This Ubuntu tutorial will show you how to install Gnome Shell 3.6 on Ubuntu 12.04. Gnome Shell 3.6 is the most recent version of Gnome Shell. So, if you want to switch from Ubuntu Unity to Gnome Shell, this tutorial is truly helpful. Personally I am not the fan of Gnome Shell but trying to install Gnome Shell 3.6 on Ubuntu 12.04 could be fun. Gnome Shell offers a basic unmodified Gnome 3 version. For some people Gnome Shell still not user friendly compared to Mint Cinnamon or Mate.  But this Gnome 3.6 brings a lot of improvements and hopefully this will change the user experiences while using it. 
Tutorial install Gnome Shell 3.6 on Ubuntu 12.04

Pear Linux 6 Alpha 4 Screenshots

Pear Linux 6 Alpha 4 Screenshots

The development version of Pear Linux is now reached version 6 Alpha 4. Here we have some Pear Linux 6 Alpha 4 screenshots fresh from the oven :). Pear Linux 6 gets many new features including a simple browser manager which lets us choose and install our favorite browser on Pear Linux. No more talking, here are some Pear Linux 6 Alpha 4 Screenshots.
Pear Linux 6 Alpha 4 Live Desktop

Wise Data Recovery Download

Wise Data Recovery 

Here we provide the download link for the latest version of Wise Data Recovery. Wise Data Recovery is a free and powerful Windows application that can be used to search and recover any deleted files from Windows computer. You can easily recover any files such as word, excel, txt, image files including jpg, bmp,png and many more. 

Why use Wise Data Recovery

My main reason is that Wise Data Recovery is a freeware. We can use this software for free of charge. And also, Wise Data Recovery comes with a simple and handy user interface.
Wise Data Recovery Download

Install XBMC on CentOS 6.2

Install XBMC on CentOS 6.2

This tutorial is going to show you how to install XBMC on CentOS 6.2. XBMC is a powerful media center application that will turn CentOS 6.2 into a complete multimedia center. For more information about XBMC I recommend you to read the XBMC description. Install XBMC on CentOS 6.2 is pretty easy but before it, you have to meet the following item.

Steps to install XBMC on CentOS 6.2

How to add RPM Fusion repository on CentOS 6.2

How to add RPM Fusion repository on CentOS 6.2

How to add RPM Fusion repository on CentOS 6.2

This tutorial will show you How to add RPM Fusion repository on CentOS 6.2. Adding RPM Fusion repository to CentOS 6.2 is pretty easy. It is important to add RPM Fusion to CentOS since this repository provides many useful applications for Fedora based Linux including CentOS 6.2

Steps to add RPM Fusion repository on CentOS 6.2

First, we need to enable EPEL repo on CentOS. To enable EPEL on CentOS, use the following command
su -c 'rpm -Uvh http://download.fedoraproject.org/pub/epel/6/i386/epel-release-6-7.noarch.rpm'

How to add RPM Forge repository on CentOS 6.2

How to add RPM Forge repository on CentOS 6.2

how to add rpm forge repository on centos 6.2

This tutorial will show you How to add RPM Forge repository on CentOS 6.2. RPMForge includes many useful applications and packages for CentOS Linux. After installing CentOS 6.2, it is recommended to add RPMForge repository to the system. 

Steps to add RPMForge repository on CentOS 6.2

For CentOS 6.2 32 bit
Download the latest rpmforge repo rpm file for 32bit system and install it. 
rpm -ivh rpmforge-release-0.5.2-2.el6.rf.i686.rpm
rpm --import http://apt.sw.be/RPM-GPG-KEY.dag.txt
Fix Guest Addition installation on CentOS 6.2

Fix Guest Addition installation on CentOS 6.2

Fix Guest Addition installation on CentOS 6.2

I was trying to install Guest Additions on CentOS 6.2. I think the installation step is correct but I still get the following error.

The headers for the current running kernel were not found. If the following
module compilation fails then this could be the reason.
The missing package can be probably installed with
yum install kernel-devel-2.6.32-220.el6.i686
Building the main Guest Additions module                   [FAILED]
The problem is that my current kernel version does not match with the Virtualbox. If you have this problem, you can solve it by doing the following:

Install Guest Additions on CentOS 6.2

Install Guest Additions on CentOS 6.2

Install Guest Additions on CentOS 6.2

This tutorial will show you how to install VirtualBox Guest Additions on CentOS 6.2. When installed on Virtualbox as guest machine, CentOS will need guest additions to be installed to get higher resolution, USB and shared folder supports. Install Guest Additions on CentOS 6.2 is not hard, but you will need to install some required packages first.

Steps to Install Guest Additions on CentOS 6.2
1. Add RPMForge repository to CentOS 6.2. You can read this guide to add RPMforge repository to CentOS 6.2.

Then eecute this command to install several packages required

yum --enablerepo rpmforge install dkms

Install Development Tools 

yum groupinstall "Development Tools"
yum install kernel-devel gcc
Add RPM Fusion Repository to Fuduntu 2012

Add RPM Fusion Repository to Fuduntu 2012

Add RPM Fusion Repository to Fuduntu 2012

This tutorial will guide you to Add RPM Fusion Repository to Fuduntu 2012. RPM Fusion provides many useful applications and packages for Fedora based Linux such as Fuduntu as well. Its pretty easy to Add RPM Repository to Fuduntu 2012. 

Command to Add RPM Fusion Repository to Fuduntu 2012

su -c 'yum localinstall --nogpgcheck http://download1.rpmfusion.org/free/fedora/rpmfusion-free-release-stable.noarch.rpm http://download1.rpmfusion.org/nonfree/fedora/rpmfusion-nonfree-release-stable.noarch.rpm'

Upgrade VirtualBox Guest Additions 4.1.22 on Fuduntu

Upgrade VirtualBox Guest Additions 4.1.22 on Fuduntu

Since the new version of VirtualBox 4.1.22 is now available, I need to upgrade the Guest Additions installed on my Fuduntu 2012 virtual machine. Upgrade VirtualBox Guest Additions 4.1.22 on Fuduntu can be done quickly and this upgrade is performed to improved the overall system performance. 
To upgrade the guest additions on Fuduntu 2012, simply go to Devices | Install Guest Additions menu. Then, press run on the confirmation window to start the installation immediately. Provide the root password to continue. 
When finished, simply reboot the virtual machine and Fuduntu now running the latest Guest Additions on board. 
Install Google Chrome on Fuduntu 2012 via YUM

Install Google Chrome on Fuduntu 2012 via YUM

Install Google Chrome on Fuduntu 2012 via YUM

This tutorial will show you how to Install Google Chrome on Fuduntu 2012 via YUM. Since Fuduntu 2012 is based on Fedora, we can use the same way to install Google Chrome on Fedora. Its pretty simple to install Google Chrome on Fuduntu 2012 via YUM.

Steps to install Google Chrome on Fuduntu 2012 via YUM

nano /etc/yum.repos.d/google-chrome.repo
Now paste the following lines 
[google-chrome]
name=google-chrome - 32-bit
baseurl=http://dl.google.com/linux/chrome/rpm/stable/i386
enabled=1
gpgcheck=1
gpgkey=https://dl-ssl.google.com/linux/linux_signing_key.pub

Install Guest Additions on Fuduntu 2012

Install Guest Additions on Fuduntu 2012

This tutorial will show you how to install Guest Additions on Fuduntu 2012. After installing Fuduntu 2012 on VirtualBox, the next important thing is to install Virtualbox Guest Additions on Fuduntu to get better performance and screen resolution. 

Steps to install Guest Additions on Fuduntu 2012

1. Mount Guest Additions via Devices > Install Guest Additions
2. Then, a confirmation window will be shown up on Fuduntu guest machine

Cannot install Grub2 Boot Loader on Debian 6.0.4 Gnome

Cannot install Grub2 Boot Loader on Debian 6.0.4 Gnome

I was trying to install Debian 6.0.4 on my VirtualBox 4.1.18. The installation went well until it reached Boot Loader installation. Debian installer failed to continue the installation since it failed to install Grub2 to the system. I tried to use LiLo but the problem persisted. What's wrong here?

Lenovo ThinkPad E125-Kecil kecil cabe rawit

Lenovo ThinkPad E125-Kecil kecil cabe rawit


Secara pribadi saya sangat puas dengan performa yang ditawarkan oleh Lenovo ThinkPad Edge E125. Sebuah notebook dengan ukuran 11.6 inch yang ditenagai oleh prosesor AMD E450 series. Saya ingin berbagi pengalaman dengan memberikan sedikit review tentang Lenovo ThinkPad Edge E125 ini. Setelah membeli Lenovo ThinkPad Edge E125, saya langsung upgrade memory (RAM) menjadi 6 GB dengan menambahkan 4 GB di slot kedua. Memory bawaannya yang hanya 2 GB terasa kurang pada awalnya.
Do not like Firefox? Chromium is better alternative

Do not like Firefox? Chromium is better alternative

I am currently testing Xubuntu 12.04 on my laptop. And personally I do not like Firefox and I am trying to replace it with Chromium. For me, Chromium is a better alternative to Mozilla Firefox to handle my web browsing activities. Its lighter, and faster compared to Firefox. Chromium also compatible with Google Chrome and can uses or install applications from Google Chrome App Store.
To install Chromium on Xubuntu 12.04, simply use the following command
sudo apt-get install chromium-browser
So what is your favorite web browser? Do you like Firefox other than Chromium?

How to install Flash Player on Xubuntu 12.04

This tutorial will show you How to install Flash Player on Xubuntu 12.04. In this tutorial, I am using a noobs method which does not having to type any command to install Adobe Flash Player on Xubuntu 12.04. When the first time using Firefox to open a flash website such as YouTube, you will get a notification on the top of Mozilla Firefox window. Simply press the Install Missing Plugins button on top right to install the required packages automatically. 
Install Virtualbox on Ubuntu 12.10

Install Virtualbox on Ubuntu 12.10

Install Virtualbox on Ubuntu 12.10

After installing Ubuntu 12.10 on my new ThinkPad Edge E125, my next goal is to Install Virtualbox on Ubuntu 12.10. Its pretty simple to Install Virtualbox on Ubuntu 12.10. Since VirtualBox is available in .deb version, we can easily install it on Ubuntu 12.10. 

Steps to Install Virtualbox on Ubuntu 12.10

  • Download VirtualBox DEB package. The latest version when this post is written is VirtualBox 4.2. You can download this package from here (32bit) and here (64bit).
  • Now right click the file virtualbox-4.2_4.2.0-80737~Ubuntu~precise_i386.deb and select Open with Ubuntu Software Center.
  • Press Install button to start the installation
  • When done, you can start using VirtualBox on Ubuntu 12.10
Alternative way to Install Virtualbox on Ubuntu 12.10

Install DownThemAll-Download Accelerator on Ubuntu 12.10

Install DownThemAll-Download Accelerator on Ubuntu 12.10

Do you need a powerful, free download manager and download accelerator for Ubuntu 12.10? Try DownThemAll, a powerful Firefox addons that provides a seamless way to manage and accelerate your download activities under Ubuntu 12.10. This download manager application works perfectly on Ubuntu 12.10 and the latest version of Mozilla Firefox 15. 

DownThemAll features

DownThemAll comes with a built in download manager and accelerator in a single app. It can replace the standard download manager on Firefox and can increase the download speed significantly. 

Running Ubuntu 12.10 on Lenovo ThinkPad Edge E125

Running Ubuntu 12.10 on Lenovo ThinkPad Edge E125

ubuntu-12-10-on-thinkpad-e125

I am still testing my new laptop using several Linux Distribution. Currently I am running the Beta version of Ubuntu 12.10 on my Lenovo ThinkPad Edge E125. I have been testing this laptop using Fedora 17 x86_64 and it works perfectly. You may want to read my confirmation about Fedora 17 works perfectly on Lenovo ThinkPad E125.

Install Cairo Dock on Ubuntu 12.10

Install Cairo Dock on Ubuntu 12.10

This Ubuntu tutorial will show you how to Install Cairo Dock on Ubuntu 12.10. Here I will show you how to install Cairo Dock 3.0.2 (when this post is written) using official repository. We can then easily upgrade to any newer version of Cairo Dock in the future. Cairo Dock is a pretty launcher set that provides a better way to access applications and opened windows on Ubuntu 12.10. 
The aim of this tutorial is to Install Cairo Dock on Ubuntu 12.10 via repository. 

How to use Smartfren Andro as Modem on Fedora 17

How to use Smartfren Andro as Modem on Fedora 17


This tutorial will show you How to use Smartfren Andro as Modem on Fedora 17. Smartfren Andro is a low en Android smartphone which uses the latest EVDO technology. This Android phone can be used as an Internet modem on Fedora Linux easily. No drivers needed to set up this Smartfren Andro as a modem on Fedora Linux.
The aim of this tutorial is to set up and configure Smartfren Andro as a Modem on Fedora. I am using Fedora 17 x86_64 edition on my ThinkPad E125 notebook series.

Fedora 17 works perfectly on Lenovo ThinkPad E125

Fedora 17 works perfectly on Lenovo ThinkPad E125

Fedora 17 works perfectly on Lenovo ThinkPad E125

I just bought a new Lenovo ThinkPad E125 semi notebook which is powered by AMD processor and Radeon VGA card on board. I try to boot my Fedora 17 x86_64 Live USB on it and amazingly it works perfectly. All devices and hardware detected automatically and I love it. The wireless device, sound and graphic card works as expected. Fedora 17 has done pretty well job here. 
If you are Lenovo ThinkPad E125 users, you may try to run on install Fedora Linux on your computer. Don't worry, It works like a charm. 

Kategori

Kategori