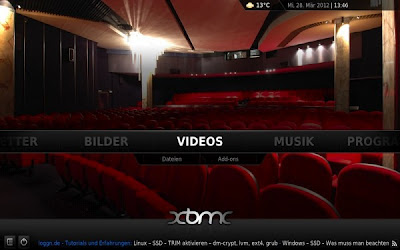
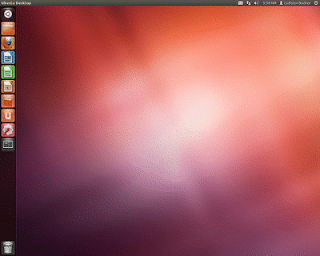
Install XBMC on Linux Mint 13
Install XBMC on Linux Mint 13
Step by step Install XBMC on Linux Mint 13
How to install VLC on Linux Mint 13
How to install VLC on Linux Mint 13
Step to install VLC on Linux Mint 13
deb http://packages.linuxmint.com/ maya main upstream import romeo
deb http://archive.ubuntu.com/ubuntu/ precise main restricted universe multiverse
deb http://archive.ubuntu.com/ubuntu/ precise-updates main restricted universe multiverse
deb http://security.ubuntu.com/ubuntu/ precise-security main restricted universe multiverse
deb http://archive.canonical.com/ubuntu/ precise partner
deb http://packages.medibuntu.org/ precise free non-free
Ubuntu 12.10 Beta 2 ISO Download
Ubuntu 12.10 Beta 2 ISO Download

Install Avast Antivirus on Linux Mint 13
Install Avast Antivirus on Linux Mint 13
Step to install Avast Antivirus on Linux Mint 13
Download the Avast 4 Workstation for Ubuntu based Linux from this link.Install it using command
sudo dpkg -i avast4workstation_1.3.0-2_i386.debFollow on screen installation wizard until finished. Once done, you can start using Avast Workstation

Install F-Prot Antivirus on Linux Mint 13
Install F-Prot Antivirus on Linux Mint 13
Step to Install F-Prot Antivirus on Linux Mint 13

F-Prot Antivirus for Linux Workstations 6.2.2
F-Prot Antivirus for Linux Workstations 6.2.2
Mint Shell 0.01 for Gnome 3
Download Mint Shell 0.01 theme

SONY Xperia S USB driver for Windows 7
SONY Xperia S USB driver for Windows 7
If you own the new SONY Xperia S Android phone series, you may download SONY PC Companion that contains the USB driver and software to run your Xperia S with Windows 7. You can do many things with this PC Companion. You can transfer files including video, audio and other files from Xperia S to Windows 7 vice versa.
PC Companion is a computer application that acts as a portal to Sony Xperia and operator features and applications, such as phone software updates, management of contacts and calendar, media management with Media Go, and a backup and restore feature for your phone content (availability of applications depends on your phone and operator).

Install Flash Plugin 11.2 on Fedora 17 via YUM
Install Flash Plugin 11.2 on Fedora 17 via YUM
A. Fedora 17 32bit
rpm -ivh http://linuxdownload.adobe.com/adobe-release/adobe-release-i386-1.0-1.noarch.rpm
rpm --import /etc/pki/rpm-gpg/RPM-GPG-KEY-adobe-linux
Genius FaceCam 315 works with Fedora 17 perfectly

Install Virtualbox 4.2 on Deepin Linux 12.04 using repository
- Add virtualbox repository to Deepin Linux 12.06
- Install Virtualbox 4.2 on Deepin Linux 12.06
Install GRUB Customizer 3.0 on Ubuntu 12.04
Install GRUB Customizer 3.0 on Ubuntu 12.04
To install GRUB Customizer 3.0 on Ubuntu, please follow these steps.
sudo add-apt-repository ppa:danielrichter2007/grub-customizer
Create Startup Disk on Deepin Linux 12.06
Create Startup Disk on Deepin Linux 12.06
How to Create Startup Disk on Deepin Linux 12.06
Cinnamon 1.6 on Ubuntu 12.04
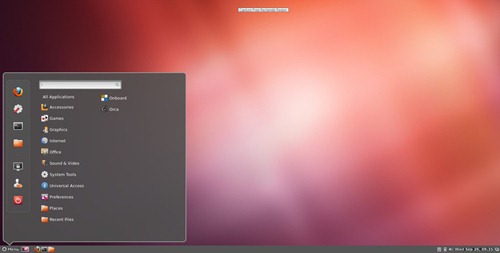
Install Cinnamon 1.6 on Ubuntu 12.04 is now possible. I was installed the latest version of Cinnamon 1.6 on Ubuntu 12.04 Precise Pangolin and it works pretty well. I want to share some screenshots of the new Cinnamon 1.6 on Ubuntu 12.04. Check these out. Next time I will post how to install Cinnamon 1.6 on Ubuntu 12.04.
Install Google Chrome on Fedora 17 via YUM repository
Install Google Chrome on Fedora 17 via YUM repository
nano /etc/yum.repos.d/google-chrome.repo

Install XBMC on Chrome OS 2.1
Tutorial How to Install XBMC on Chrome OS 2.1

Install Google Chrome on OpenSUSE 12.2
How to Install Google Chrome Stable on OpenSUSE 12.2 using repository
How to install Google Chrome on OpenSUSE 12.2

Cara install paket RPM di Linux Mint 13
Cara install paket RPM di Linux Mint 13
Upgrade to Cinnamon 1.6 on Linux Mint 13
Tutorial how to Upgrade to Cinnamon 1.6 on Linux Mint 13
cinnamon --version

How to start and stop network connection on OpenSUSE 12.2
Tutorial how to start and stop network connection on OpenSUSE 12.2
A. Start Network Service on OpenSUSE 12.2
/etc/init.d/network start
/etc/init.d/network start eth0
Cara install software di Ubuntu Server
Hai akhirnya posting lagi. Kali ini akan kita pelajari cara install software di Ubuntu Server. Karena Ubuntu Server tidak dilengkapi dengan antarmuka grafis, maka mau tidak mau kita harus membiasakan diri untuk selalu berhadapan dengan Terminal atau command line interface. Tetapi justru itulah nikmatnya Ubuntu Server jika kita bisa menguasai perintah-perintah dasar instalasi software di Ubuntu Server. Saya bukan ahli Linux ataupun sysadmin yang sudah malang melintang di dunia Linux. Saya hanya ingin menuliskan sesuatu yang saya ketahui agar saya selalu ingat dan apabila berguna bagi rekan semua maka saya sangat senang.
Install Ubuntu restricted extras on Pear Linux 6
Install XBMC on Pear Linux 6
A. Add the XBMC repository to Pear Linux 6
sudo apt-add-repository ppa:nathan-renniewaldock/xbmc-stable
sudo apt-get update
Mount NTFS drives on Pear Linux using NTFS Configuration Tool
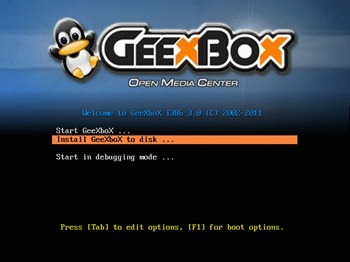
How to install GeeXbox 3.0 in 3 minutes
GeeXboX 3.0 is now released. This tutorial will show you how to install GeeXbox 3.0. We install this GeeXboX 3.0 on a virtual machine. GeeXboX is pretty easy to be installed. In few minutes we can get GeeXboX 3.0 up and running and we can start building and use it as our multimedia center.
Steps to install GeeXboX 3.0
I assume we have GeeXboX 3.0 iso file on hand. So, we can create a new virtual machine and boot it using GeeXboX 3.0 iso.
Turn Ubuntu Server into multimedia server using Plex Media Server
Tutorial Objectives:
- Install PlexMediaServer on Ubuntu 12.10 server
- Play multimedia files from other computer and Android phones
Requirements:
- Ubuntu 12.10 Server (you can use previous Ubuntu Server 12.04 or earlier as well)
- PlexMediaCenter binary file
- Internet connection
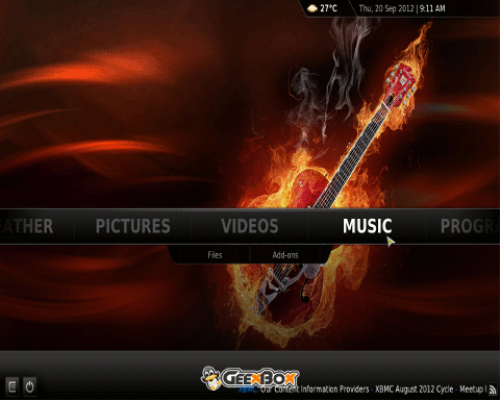
GeeXboX 3.0 Screenshots Collection
The new version of GeeXboX 3.0 distribution is now available for download. GeeXboX is a Linux distribution that provides a multimedia center out of the box. It comes with the new XBMC version 11 “Eden” which includes many improvements. Here we have some nice screenshots of GeeXboX 3.0. GeeXboX can be run as a Live CD and also can be installed on to hard disk.
Install Flash Plugin on Pear Linux 6
Adobe Flash Plugin installer for Pear Linux 6.0
How to create Fedora 18 Live USB Persistent Mode
On the previous tutorial, I’ve written about how to create Fedora Live USB. And unfortunately, with that method, we cannot save the settings and configuration permanently to Fedora 18. Now, I want to share how to create Fedora 18 Live USB with Persistent Mode which means we can save our configuration and settings permanently.
Requirements:
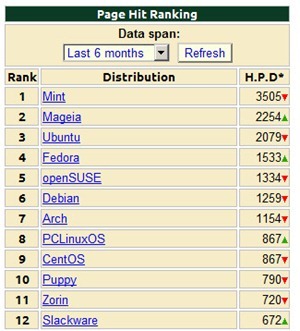
Ubuntu popularity drop dramatically-Distrowatch hits analysis
I just opened my favorite ISO Linux download site distrowatch.com. In last few years, Ubuntu has always been the top number one based on page hit ranking. But then shifted to Linux Mint after. And incredibly now Ubuntu re-shifted by Mageia Linux. So Ubuntu is now no longer being number one. Is this a sign of the falling popularity of Ubuntu? And what causes it?
Download GeeXboX 3.0 ISO
Download GeeXboX 3.0 ISO
The new version of GeeXboX 3.0 has been released. Please welcome the new GeeXboX 3.0, a powerful Linux Distribution that oriented for Linux media center purposes. GeeXboX 3.0 brings some new features such as XBMC 11 “Eden” integration and also integrates PVR functionality which means we can play and record TV directly from GeeXbox 3.0. Interesting right?
GeeXboX 3.0 ISO is available in two different arch (32 and 64 bit). Download the GeeXboX 3.0 ISO and turn your old PC or laptop into a media center for your home.
Marissa Mayer-Sexy and Beautiful Yahoo CEO
I am a fan on Marissa Mayer. She was a popular Google’s CEO and already produces some top features on Google. Now, Marissa Mayer is Yahoo CEO. She moved to Yahoo with a controversial way but I don’t want to talk about it. As a women, Marissa Mayer is perfect. She has a beautiful face and a good looking sexy body. And, she is a rich women on the planet. Here are some Marissa Mayer sexy photos I grabbed from the net. Check these out.
Install Google Chrome on Fedora 18
Tutorial objective:
Download Blackberry OS 7.1.0.694 for Torch 9860
Download the new updated version of Blackberry OS version 7.1.0.694 for Blackberry Torch 9860 series. Download and update your Blackberry OS to this version 7.1.0.694. This new update brings a lot of improvements. Download this BlackBerry Handheld Software v7.1.0.1997 (Multilanguage) from this link. Please do it at your own risk. We do not provide tutorial and guarantee that it will work on your device. Do it carefully.
Download details:
Package Version: 7.1.0.1997
Applications: 7.1.0.694
Software Platform: 5.1.0.507
File name: 9860M_PBr7.1.0_rel1997_PL5.1.0.507_A7.1.0.694_AT_T .exe
File size: 249.39MB
Download Blackberry OS 7.1.0.649 for Blackberry Bold 9900
If you own BlackBerry Bold 9900 Dakota series, you may upgrade your Blackberry OS to this new version. Here we provide the download link for Blackberry OS version 7.1.0.649 available for Bold 9900 series. To download, visit this website and press Download button. In order to download this Blackberry OS 7.1 you must register yourself first. Its free. We do not provide the tutorial how to upgrade Blackberry Bold 9900 with this Blackberry OS 7.1.0.649.
Add new user and group to FreeNAS
In this post I want to show you how to add new user and new group to FreeNAS. FreeNAS is a simple and powerful file server appliance for your network. Before we publish our shares to the network, it is good to have group and users well set up on FreeNAS. Then we can restrict the shared folder for some user or group only and give no access for anyone not on the user list.
How to add user and group on FreeNAS
1. Login to FreeNAS web GUI. It usually can be done by typing the ip address of the FreeNAS server on a web browser like Google Chrome.
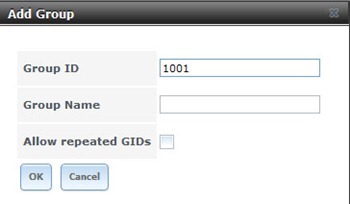
2. On the web administration page, click Groups > Add Group
3. Type the group name and press OK to confirm

Install Gnome 3 on Ubuntu 12.10 Quantal Quetzal
How to install Gnome Shell on Ubuntu 12.10
main restricted deb http://archive.ubuntu.com/ubuntu/ quantal main restricted universe deb http://security.ubuntu.com/ubuntu/ quantal-security main restricted universe deb http://archive.ubuntu.com/ubuntu/ quantal-updates main restricted universe
Install Oracle Java 7 on Linux Mint 13
Fedora 18 Tutorial-Install Virtualbox Guest Additions
 In this tutorial we will show you how to install Virtualbox Guest Additions on Fedora 18. I was installing Fedora 18 Alpha on my Virtualbox 4.1.22. After the installation finished,, the next important thing is to install the Virtualbox Guest Additions on Fedora 18 to get better performance, and higher resolution.
Tutorial Objective:
This guide will try to install VirtualBox Guest Additions on Fedora 18 guest machine installed on Virtualbox. Then also, we fix some errors on the installation steps.
Tutorial How to install Fedora 18 part 2
Please read the tutorial how to install Fedora 18 part 1 before continuing to this part 2. After installation finished, reboot your PC and we still need to configure some settings after reboot.
Tutorial How to install Fedora 18 Alpha
Step to Install Fedora 18
How to connect to remote Ubuntu server 12.10 from Windows
 This brief tutorial will show you how to connect to remote Ubuntu server 12.10 from Windows machine. Since there is no GUI available on Ubuntu Server 12.10, we can only connect to remote Ubuntu server via command line. If we are trying to manage the server from a Windows computer, we can use Putty. Putty is a simple application to connect to remote computer via SSH, Telnet, Rlogin or other protocols.
In order to connect to remote Ubuntu Server 12.10 from Windows, you can follow this tips.
Linux Mint 13 Maya Review
Linux Mint 13 Maya Review
There are so many Linux distribution spread out on the net. But, only few of them are good and easy for a newbie. And Linux Mint 13 Maya is one of them. For both new or advanced Linux users, Linux Mint 13 has everything. A clean and sleek desktop combined with many useful applications on a standard installation.Linux Mint 13 is available in some flavors such as MATE, Cinnamon and some others.
Install Oracle Java on Deepin Linux 12.06 via PPA
How to install Oracle Java on Deepin Linux 12.06 via PPA
sudo add-apt-repository ppa:webupd8team/java -y
sudo apt-get update
sudo apt-get install oracle-java7-installer

Install NX Nomachine on Deepin Linux 12.06
How to Install NX Nomachine 4 on Deepin Linux 12.06
Install NX Nomachine 4 on Linux Mint 13
How to install Install NX Nomachine 4 on Linux Mint 13
Tutorial Objectives
NX Nomachine 4 for Linux
Download NX Nomachine 4 for Linux
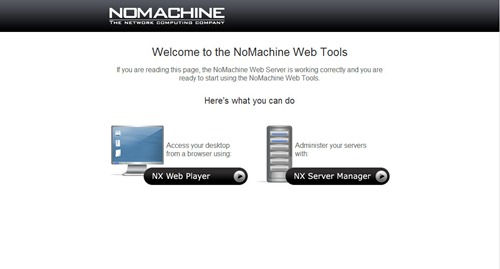
The new version of NX Nomachine, the popular remote access application for Linux is now available. Here is the new NX Nomachine 4 Preview. NX Nomachine 4 now consist of 2 different packages (server and player). There is no more NX Node anymore on this new release. As always, NX Nomachine is available in several version (DEB, RPM and Windows) packages. Here we provide the download link for NX Nomachine for Linux (DEB and RPM).
NoMachine software gives you free, easy-to-use remote access to computer from any Windows, Mac, and Linux machine. Whether you are working from home or from on the road, accessing your own computer or helping out with a friend's, NoMachine is for you. Another good thing is that on this new NX NoMachine is that we can access our remote desktop using a web browser like Google Chrome.
Create Fedora 18 Live USB
Tutorial how to create Fedora 18 Live USB using Unetbootin.
 There are several ways to create Fedora Live 18 USB. On this tutorial, we will show you how to create the new Fedora 18 Live USB using Unetbootin. Unetbootin is a popular application to create Linux Live USB. Unetbootin is available for Windows, Linux and Mac. You may want to have a look at our Fedora 18 screenshots collection before proceeding to this tutorial. When you create Fedora 18 live usb using Unetbootin, there is no way to create persistent space on it. Also, when I try to boot my SONY Vaio F series Laptop with Intel Core i7 and nVidia graphic card, the Live USB seems not working properly.
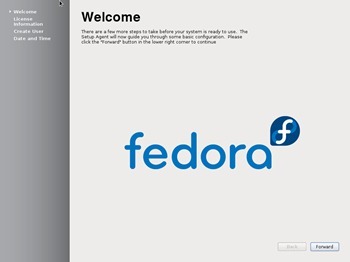
Fedora 18 Screenshots Tour
Here we have some nice Fedora 18 screenshots collection we want to share with you. Fedora 18 is currently reached version Alpha and you can download the Fedora 18 ISO for testing on your own computer. Fedora 18 Alpha features: Gnome 3.6, RPM 4.10, Samba 4, Fedora Secure boot that supports UEFI features, Python 3.3 and many more. See complete list of Fedora 18 features.
Fedora 18 Screenshots
Fedora 18 alpha is now available
The new version of Fedora Linux is now reached Alpha stage. Please welcome this new Fedora 18 Alpha with code name "Spherical Cow". This new Fedora 18 comes with many interesting features. If you hate Gnome 3, this new version offers several desktop environment upon install. You can select between Gnome, KDE, MATE, Xfce and Sugar on Stick. I am currently downloading the Fedora 18 ISO. I will share some screenshots of this new Fedora 18 on the next post. As always Fedora is available on 32 bit and 64 bit edition. You may download the LiveCD version or DVD edition.
Linux Mint 13 Cinnamon Screenshots
Linux Mint 13 Cinnamon Screenshots
Install Cinnamon on Linux Mint 13
A. Via Synaptic Package Manager (GUI)
Linux Mint 14 Nadia Release Date
The upcoming release of Linux Mint 14 is currently being developed by Linux Mint team. Many Linux Mint fans are waiting with great enthusiasm, including me. Currently there still no exact information about the release date of Linux Mint 14. But, we got a clue from the developer team stated that Linux Mint 14 Nadia will be available at the end of November 2012.

How to install nvidia driver on Linux Mint 13
Linux Mint tutorial – how to install nvidia driver on Linux Mint 13
I am using Linux Mint 13 Mate and I want to show you how to install nVidia driver on Linux Mint 13. If you are running Linux Mint 13 on a PC or Laptop with nVidia VGA card installed on it, you may need to install the nVidia driver manually. This because Linux Mint 13 does not includes the proprietary driver for nVidia graphic card. But don't worry, it only takes 2 or 3 minutes depend on the your internet speed.
Linux Mint 13 Cinnamon YouTube Video Review
The following video shows the Linux Mint 13 Cinnamon in actions
Linux Mint 13 System Requirements
- 600 MHz x86 processor
- 512 MB RAM
- 5 GB Hard disk
- 800 x 600 monitor resolution
Linux Mint Tutorial – Create Linux Mint 13 MATE Live USB
- Download and Install Unetbootin
- Create Linux Mint 13 MATE Live USB
Linux Mint 13 Download - Maya MATE Desktop
Linux Mint 13 Tutorial - Install Adobe Flash Plugin
Install Opera web browser on Pure OS 6
 Latest stable version of Opera 11.2 is now available for download. This tutorial will show you how to install the new Opera 11.2 on Pure OS 6. Pure OS comes with very limited applications. Installing Opera web browser on Pure OS will add more options to users to use the favorite web browser.
 How to install Opera web browser on Pure OS 6
Adobe Flash Player 11.2 for RHEL and Centos 6
Download Adobe Flash Player 11.2 RPM
How to install DEB file on Ubuntu
How to install DEB file on Ubuntu
A Using graphical interface (GUI)
How to install Ubuntu Server 12.04 Part 3-Final
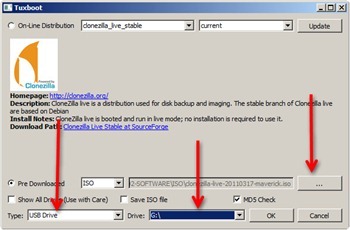
How to create Clonezilla Live USB using Tuxboot
Create Clonezilla Live USB using Tuxboot
Tuxboot is a simple and easy to use application that will help us to create Clonezilla Live USB. With the help of Tuxboot, we can run Clonezilla from a USB flash disk and perform backup and restore tasks right away from a flash disk. This tutorial will show you how to create Clonezilla Live USB using Tuxboot.
1. Download Clonezilla latest version ISO and Tuxboot application (Windows or Linux)
2. Run Tuxboot
Browse the Clonezilla ISO and select USB Drive. Don’t forget to select the USB Flash disk drive. Press OK when ready. Tuxboot will copy files from the ISO file to flash disk.
When finished, boot your computer and make sure the first boot option is USB Flash Disk
How to install Ubuntu Server 12.04 part 2
Ubuntu Tutorial-How to install Ubuntu Server 12.04
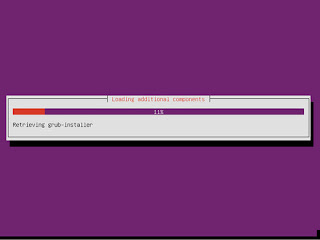
 The updated version of Ubuntu server 12.04.1 LTS has been released. This tutorial will show you how to install Ubuntu Server 12.04 step by step complete with screenshots. Ubuntu Server is a lightweight Linux distribution that is powerful, easy to manage and scalable. We can easily install Ubuntu Server on a dedicated PC or can also be installed on Proxmox VE, VirtualBox or VMware Workstation as a virtual server. Ready to install?
1. Boot the PC or virtual machine using Ubuntu server 12.04 ISO file.
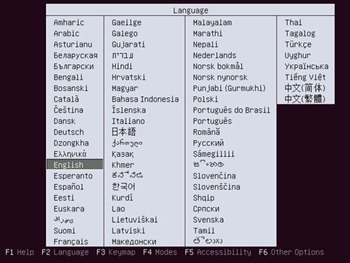
2. On the first screen, select the language from the list.
Ubuntu Server Tutorial–How to add users to group
 In the next few posts we will discuss about Ubuntu Server Tutorial for beginner. We try to include some basic tutorial to handle Ubuntu Server via command line. On this first Ubuntu Server tutorial, we will show you how to add new users to existing group, create new group and add existing users to existing group. This practice will be useful when we are managing multiple users on Ubuntu or Linux networking using Samba server.
A. Add new group in Ubuntu Server
To add new Group, we can use “groupadd” command. See this example below to add new group called “gis”.
groupadd gis
Every group exist in Ubuntu is saved in /etc/group. Now check if “gis” group is listed on /etc/group.
grep gis /etc/group
It will produce something like this:
gis:x:1001:

